This is the guide I wish I had had two years ago when I first heard about "self-hosting"; I would have embarked on this empowering adventure a lot sooner. My wish: that it can prove useful for non-techies who are curious about leaving centralized, proprietary platforms and running their own essential digital services.
Last week in Part 1 I covered the reasons why people may decide to self-host digital services (social media, file hosting, photo sharing...) and I discussed tech requirements: a server and a domain name.
Today, in part 2, I will walk you through the steps of installing YunoHost, the system that (in their own words) “installs itself on a server and allows you to install and maintain - with very little technical knowledge - digital services (apps) that you control.”
YunoHost already has a superb, really clear official guide that covers various setup scenarios:
Thing is, some non-techies may be slightly intimidated by it, especially if it's the first time they use Terminal or edit DNS records; I decided to create a step-by-step visual guide that shows you exactly what happens and what to expect.
Tomorrow – December 17th – marks the one year anniversary of the beginning of my self-hosting adventures. It's when I signed up for a VPS and installed YunoHost for the first time. I want to take this opportunity to thank Ethan Sholly of selfh.st who encouraged me by saying "just get started... you learn by doing things" (so true!) and once again ilja for recommending I check out YunoHost.org. My digital life has been completely transformed... for the better.
An important note before we get started: YunoHost is a project run by a small team of volunteers, operating on a micro budget (considering the hundreds of apps they package and maintain). The only way to guarantee the health and longevity of the project is to support them with donations - every Euro counts. I personally set up a monthly recurring payment to their project. If you prefer, you could do a one-off donation. So enjoy this guide and if you end up installing and using YunoHost, please consider donating to them here: https://donate.yunohost.org
Are you ready to get started?
Let's prepare for the installation
First off, as I explained in the previous post, you should have a virtual private server (VPS) with Debian 12 installed (not 13) and a domain name by now. In the previous post I explained the benefits of a VPS over an old computer or a Raspberry Pi, as it's easier for non-techies. But of course if you have an old device that you'd like to repurpose as a server, there is a YunoHost guide for that too.
To demonstrate how easy and fast it is to install YunoHost and associate a domain name to it, I will use a stopwatch, so you can anticipate how long each step is.
The whole process, from start to finish, should take in between 20 to 30 minutes if it's your first time. If you’re confident and fast with Terminal and DNS records, the process is closer to 12 minutes.
I would advise you to use virtual windows on your computer and dedicate:
- one for Terminal (where the first part of the installation will take place)
- one for a web browser connected to your domain name registrar
- one for your password manager*
*I hope you do use a password manager and complex, unique passwords to keep track of your digital life. If you don't, I would recommend reading this article: "Digital Security 101: Time to start using a password manager."
STEP 1: Log onto your VPS with Terminal
⏳ Estimated time: less than 1 minute
If you’re on Hostinger, simply log into your account, click on “VPS” in the left-side menu, when the VPS’s name appears click on the button “Manage” and then on the button “Terminal”:

If you’re on Hetzner or another VPS provider that doesn’t offer a native, in-browser terminal, simply open app the Terminal app on your computer and log onto your VPS with the username and password you set up during the signup process.
Simply look up "Terminal" on your computer (yes, the app is pre-installed). To log onto your VPS, type the command:
Then type the password that you should have received via email. Once you're logged in, the system will ask you to immediately change the password... that's where the password manager comes in, as it can easily and quickly generated a complex, unique password for you.
STEP 2: fetch updates and upgrade packages
⏳ Estimated time: 1-2 minutes
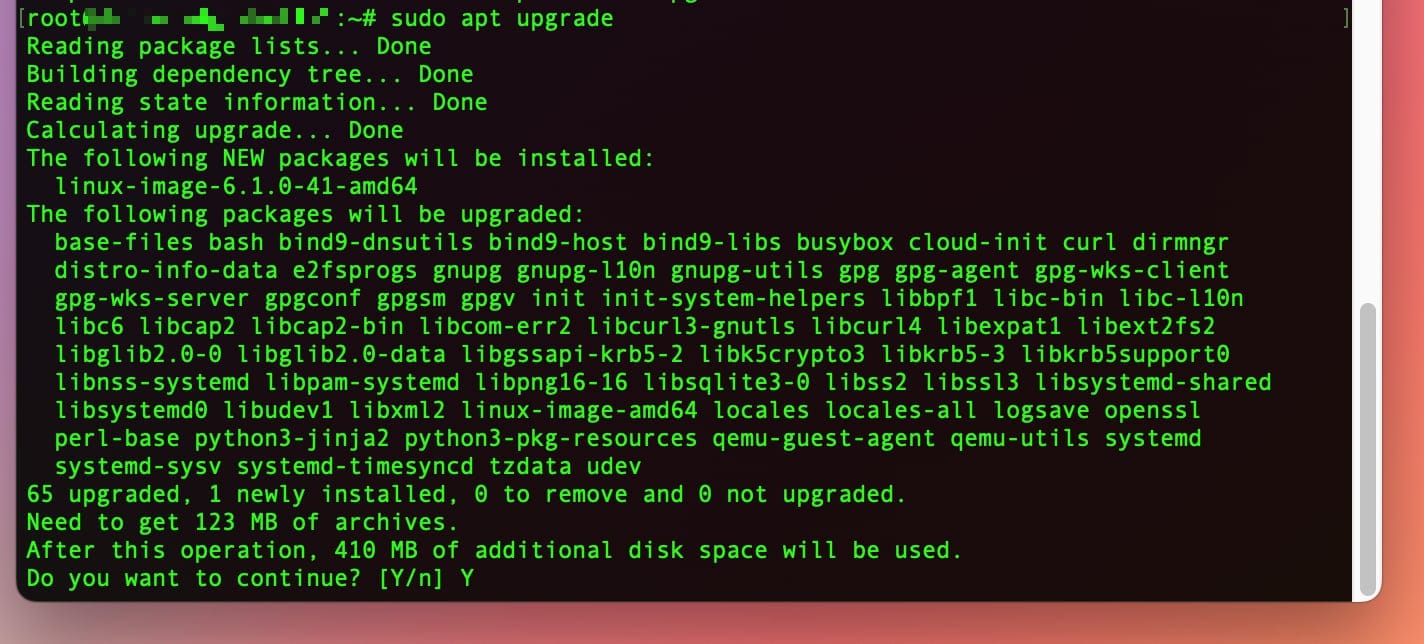
Whenever I first log into a VPS, I ran the commands:
and then:
and fetch the latest versions of packages installed on the server.
As this post explains:
“apt update” updates the list of available packages and their versions, but it does not install or upgrade any packages. “apt upgrade” actually installs newer versions of the packages you have. After updating the lists, the package manager knows about available updates for the software you have installed. This is why you first want to update.
I think of it as good digital housekeeping practices before installing new software.
STEP 3: install YunoHost ! 🚀
⏳ Estimated time: 3 minutes
As YunoHost’s own official guide explains: you need to “make sure you are root (or type sudo -i to become root)” ... basically, you need to have the highest admin privileges on your server to accomplish the following steps. If you logged in as root you're all set... ditto for clicking on the Terminal button on Hostinger.
Now, simply copy and paste into your Terminal window the following command and hit “Enter”:
You will need to confirm a couple of things:
- That you allow YunoHost to install some important services that may “rework the configuration of some services already installed on your VPS” (like nginx, postfix and dovecot). You don’t need to know what they are, just trust the process and type “y” for YES.
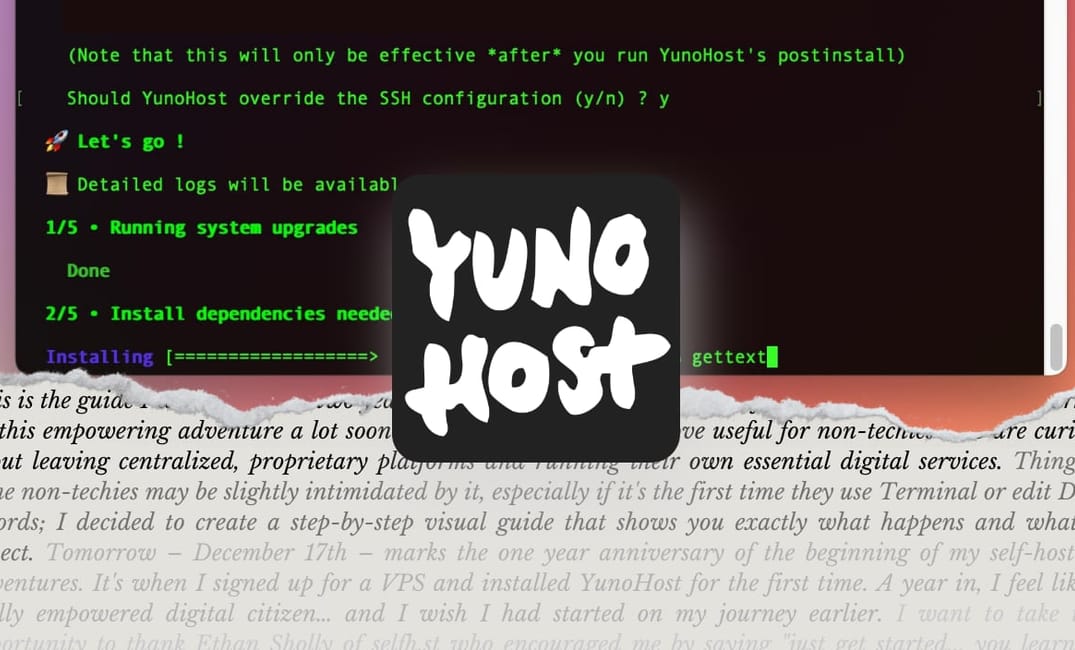
- You need to allow YunoHost to override the SSH configuration. Again type “y” for YES.
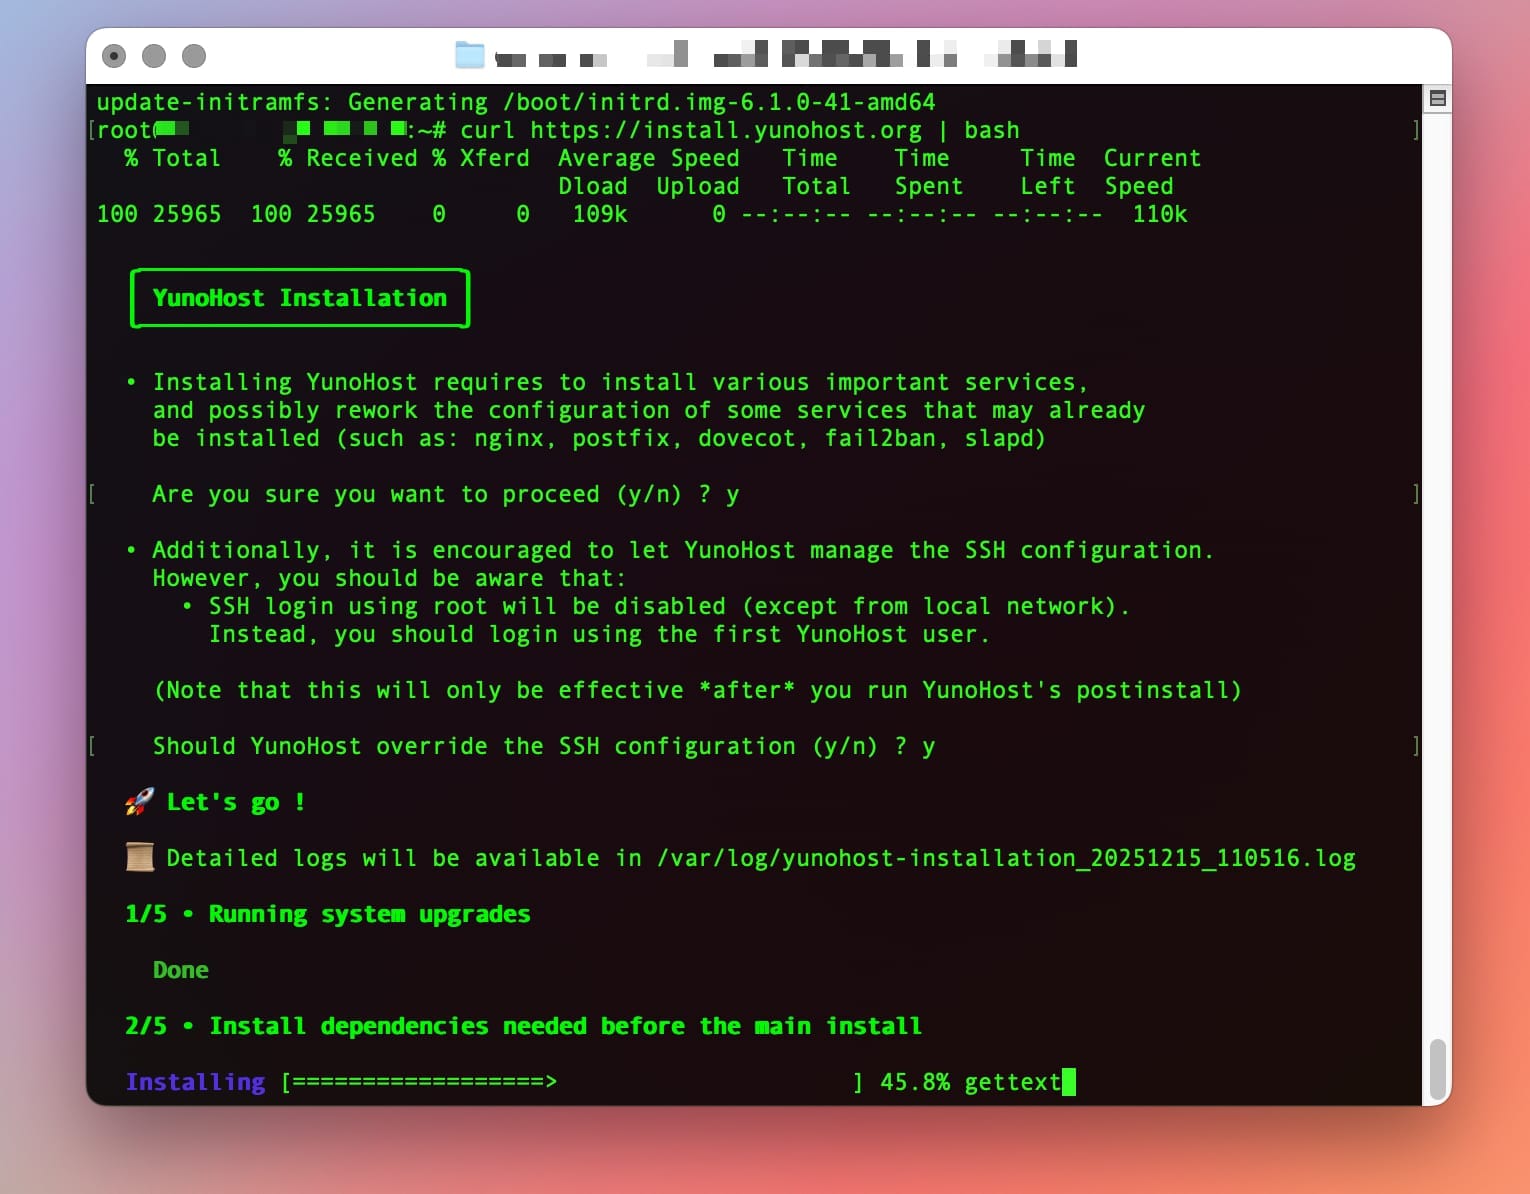
After these two confirmations, you can go make yourself a cup of tea or a coffee and let YunoHost do its magic. I used a stopwatch to see how long the process would take and on a basic Hetzner server, the YunoHost installation took exactly 2 minutes and 8 seconds!!! (Even I couldn’t believe it, from last year I remembered it was something like 5 minutes. No, much faster than that!)
STEP 4: POST-INSTALLATION: create a user account, connect your domain name and change DNS records
⏳ Estimated time: 12 minutes
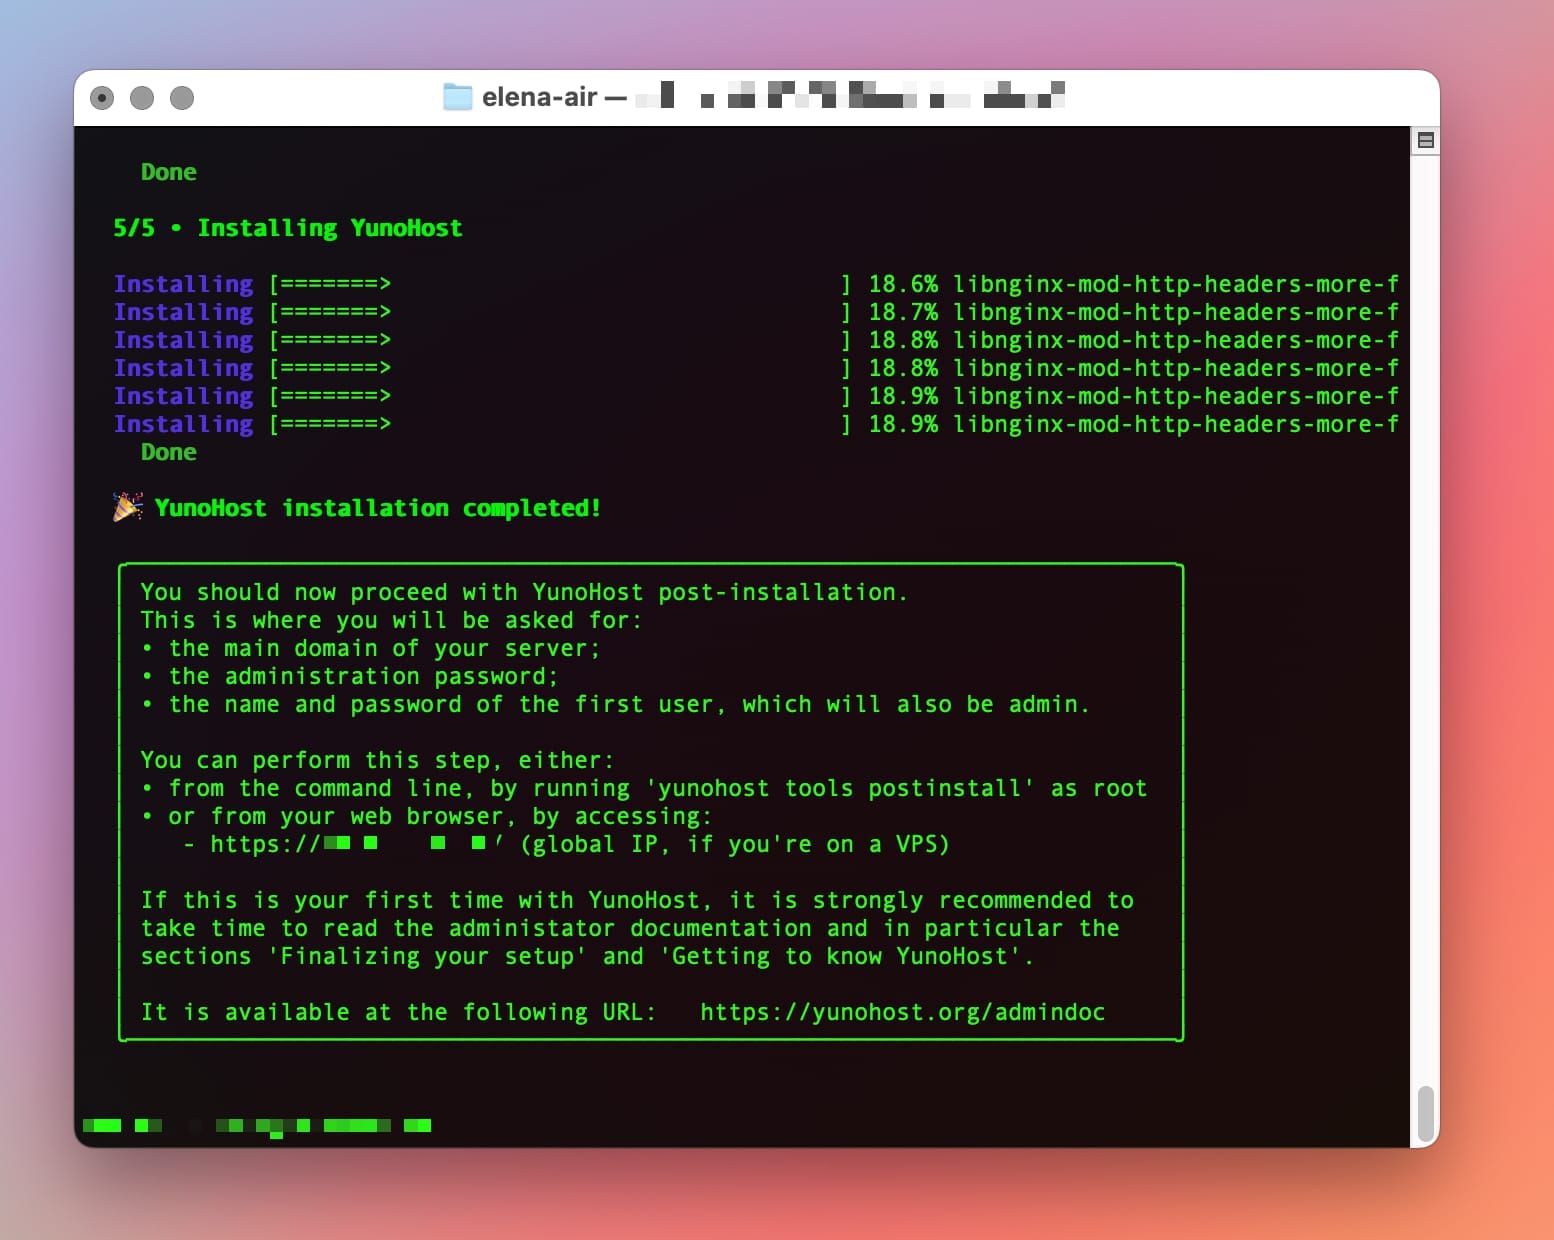
In Terminal, after receiving the confirmation that the installation was successfully completed, you should have seen recommendations about what to do next (like the photo above). Copy the URL from Terminal (it's the IP address of your VPS), paste it onto your web browser and hit Enter. You should see this warning:
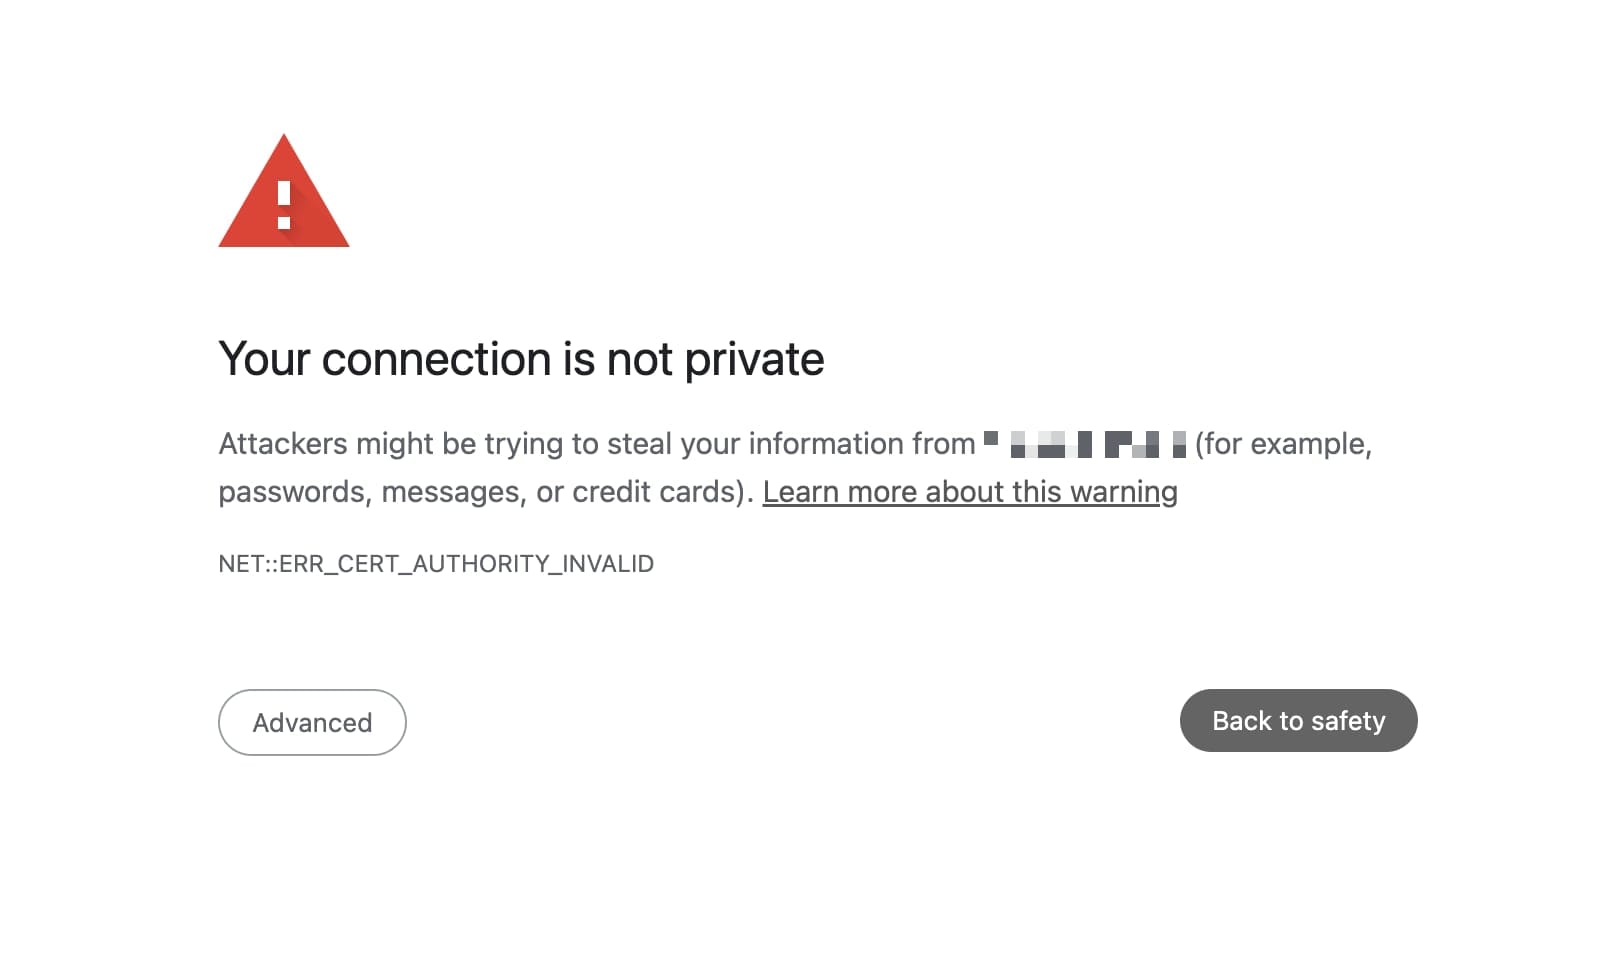
Click on the button "Advanced":

And then click on the link at the bottom that says "Proceed to... your IP address (unsafe)". This is absolutely normal – it's because you don't have an SSL certificate installed yet.
This is the screen you should see next:
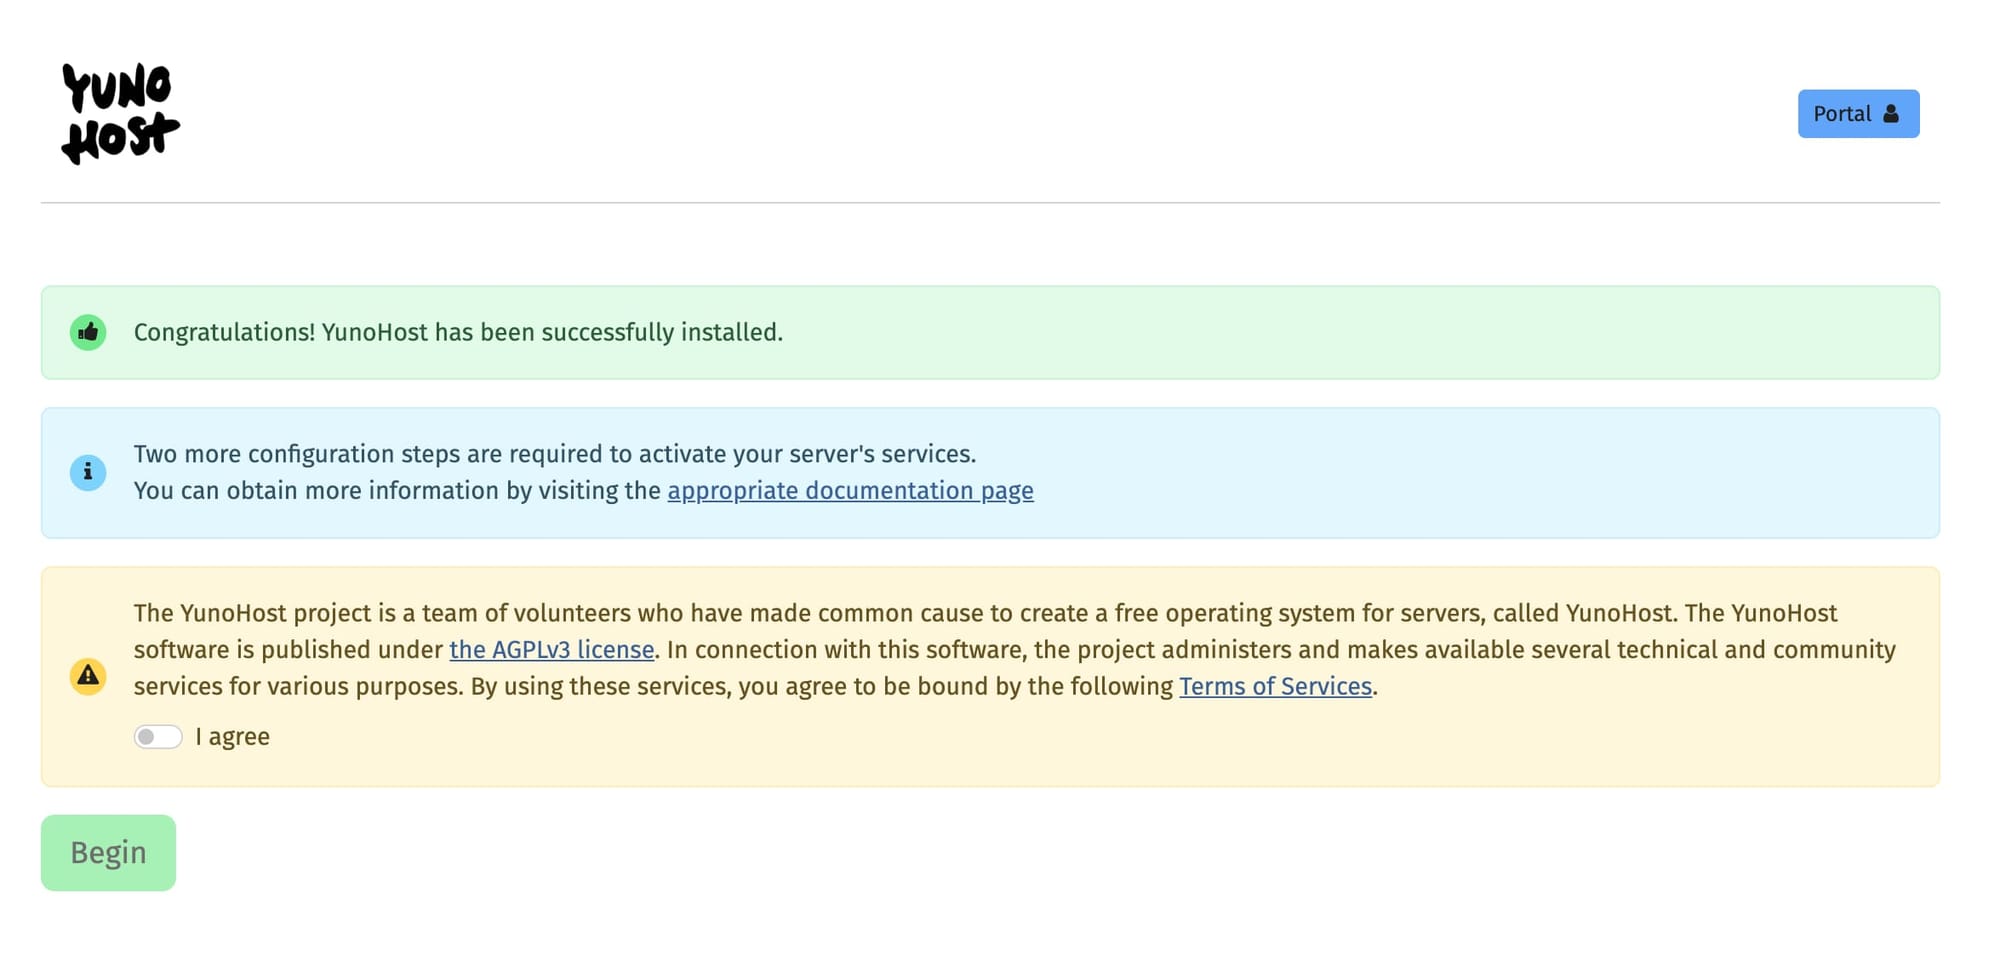
Turn on "I agree" and click on the green button that says "Begin."
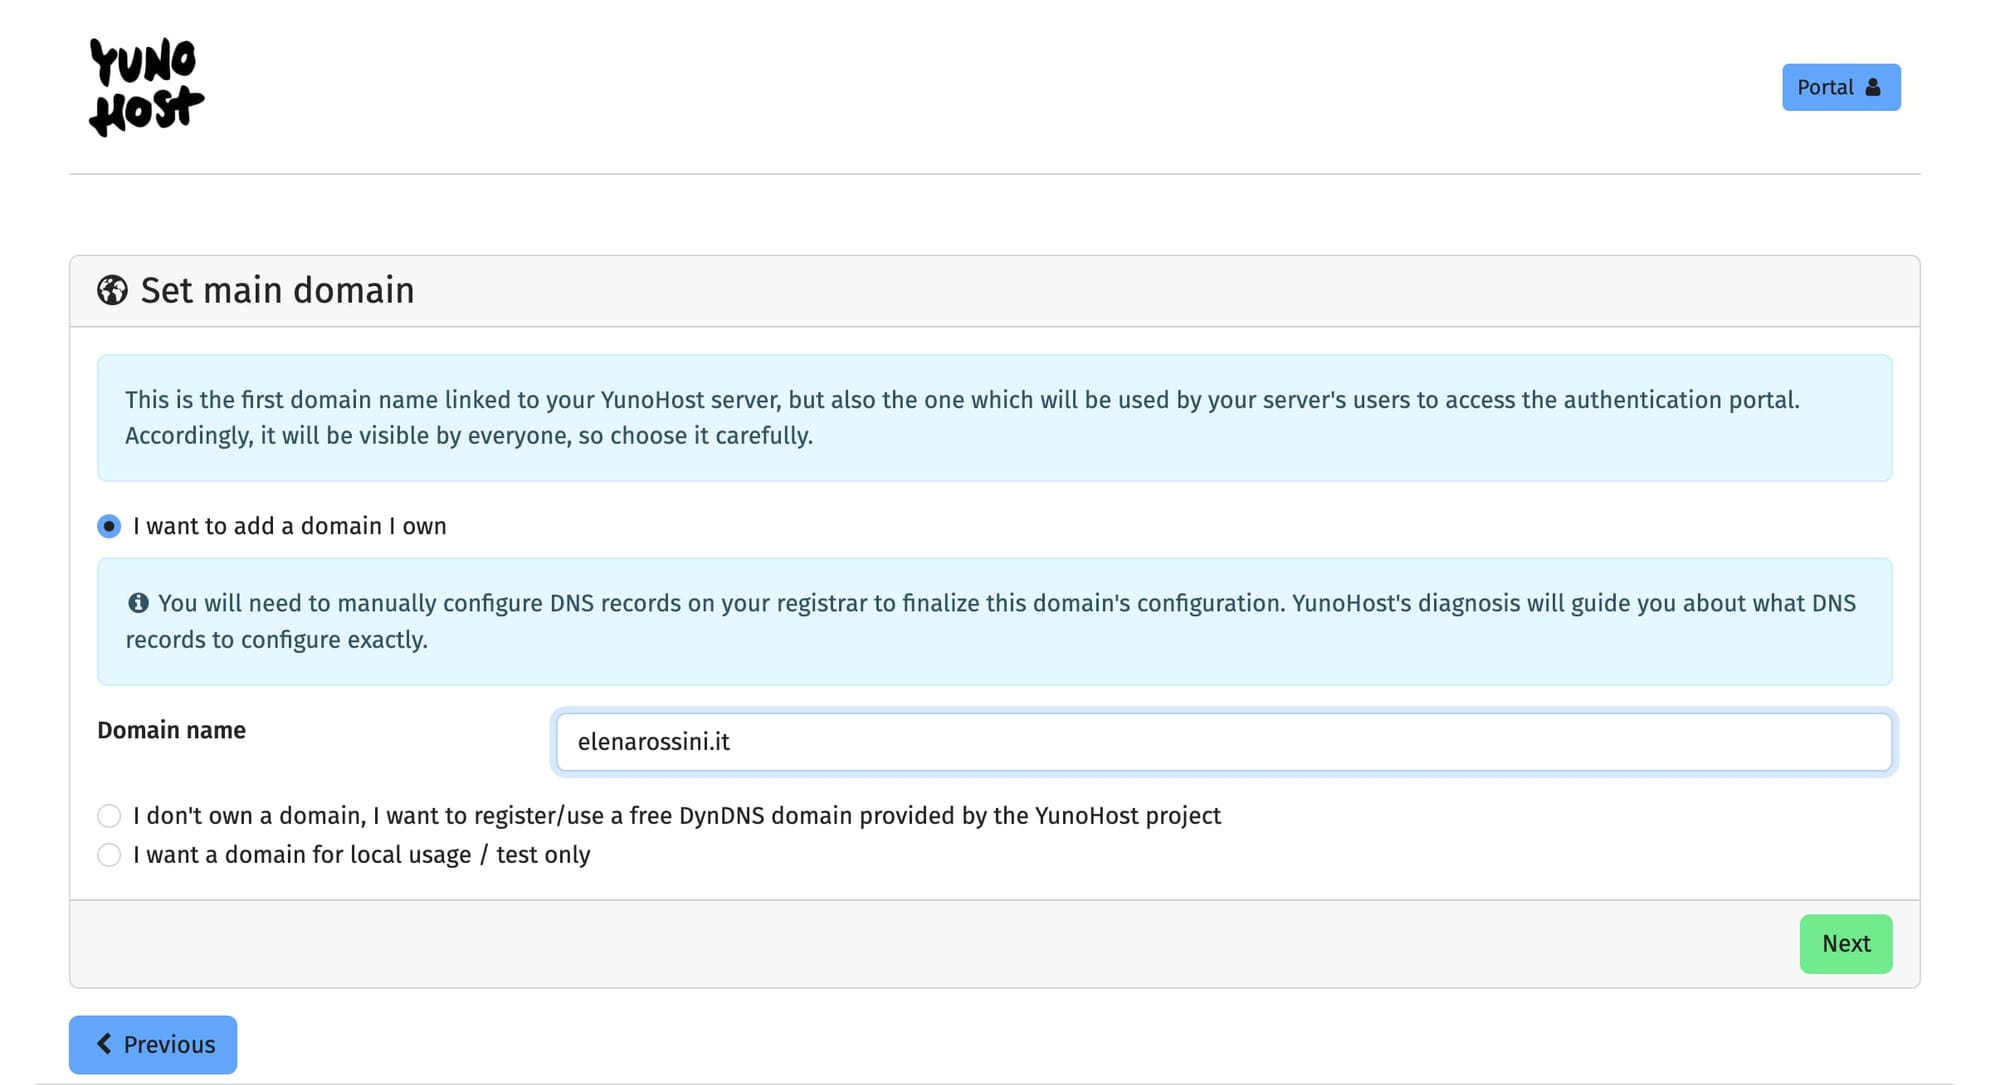
🌐 Set main domain & connect your domain
To make the process easier to understand, I will use as example the domain elenarossini.it (which I got on IONOS for 1 Euro a year).
👤 Create first admin user
After clicking "Next" on the previous page, you should see this screen:
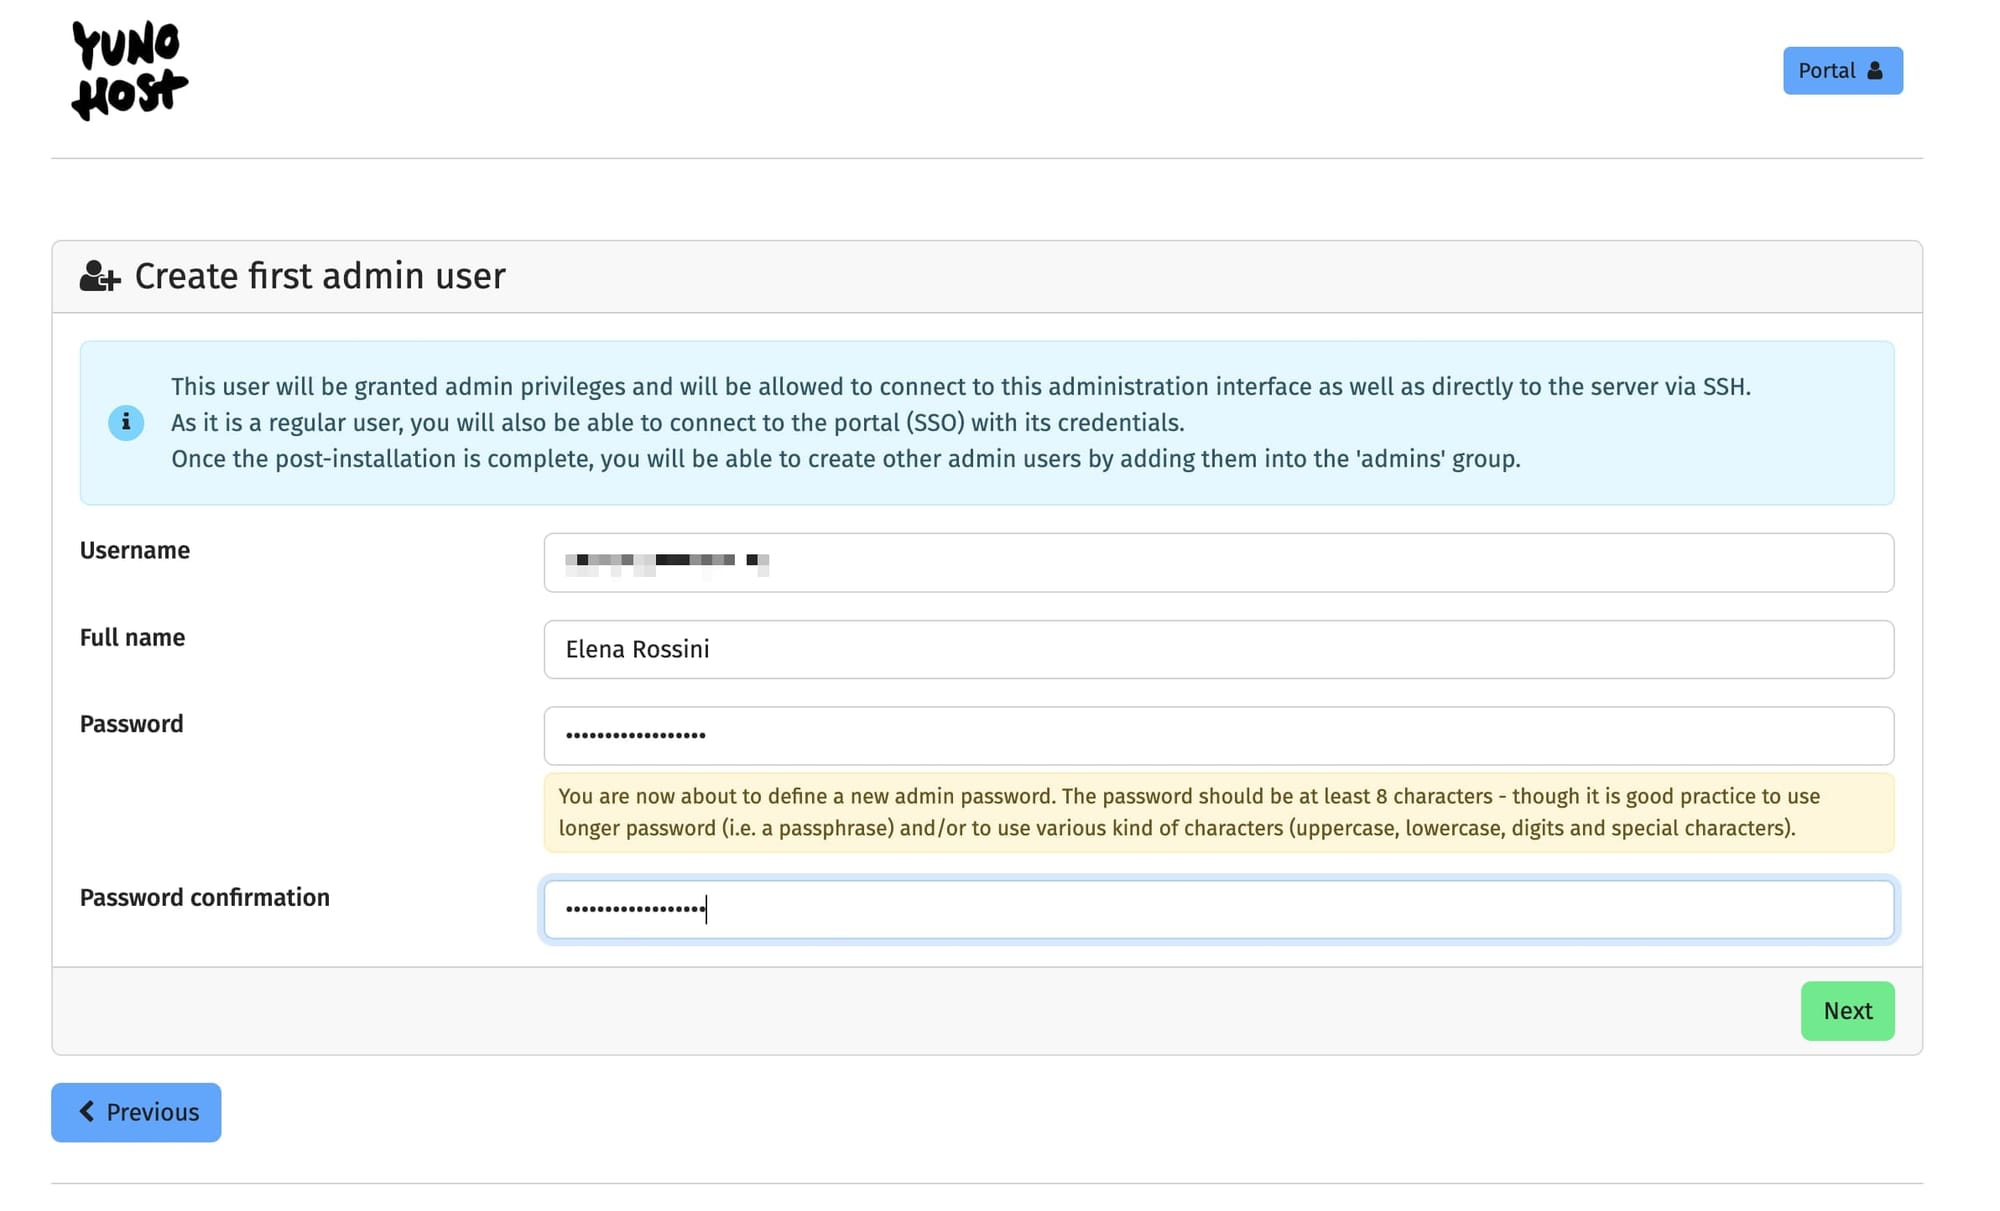
Following YunoHost's advice:
You should pick a username and a reasonably complex password. (We cannot stress enough that the password should be robust!) This user will be added to the Admins group, and will therefore be able to access the user portal...
After clicking the green button "Next" you should see this message: "You are about to launch the post-installation process on the domain [your URL]. It may take a few minutes, do not interrupt the operation."
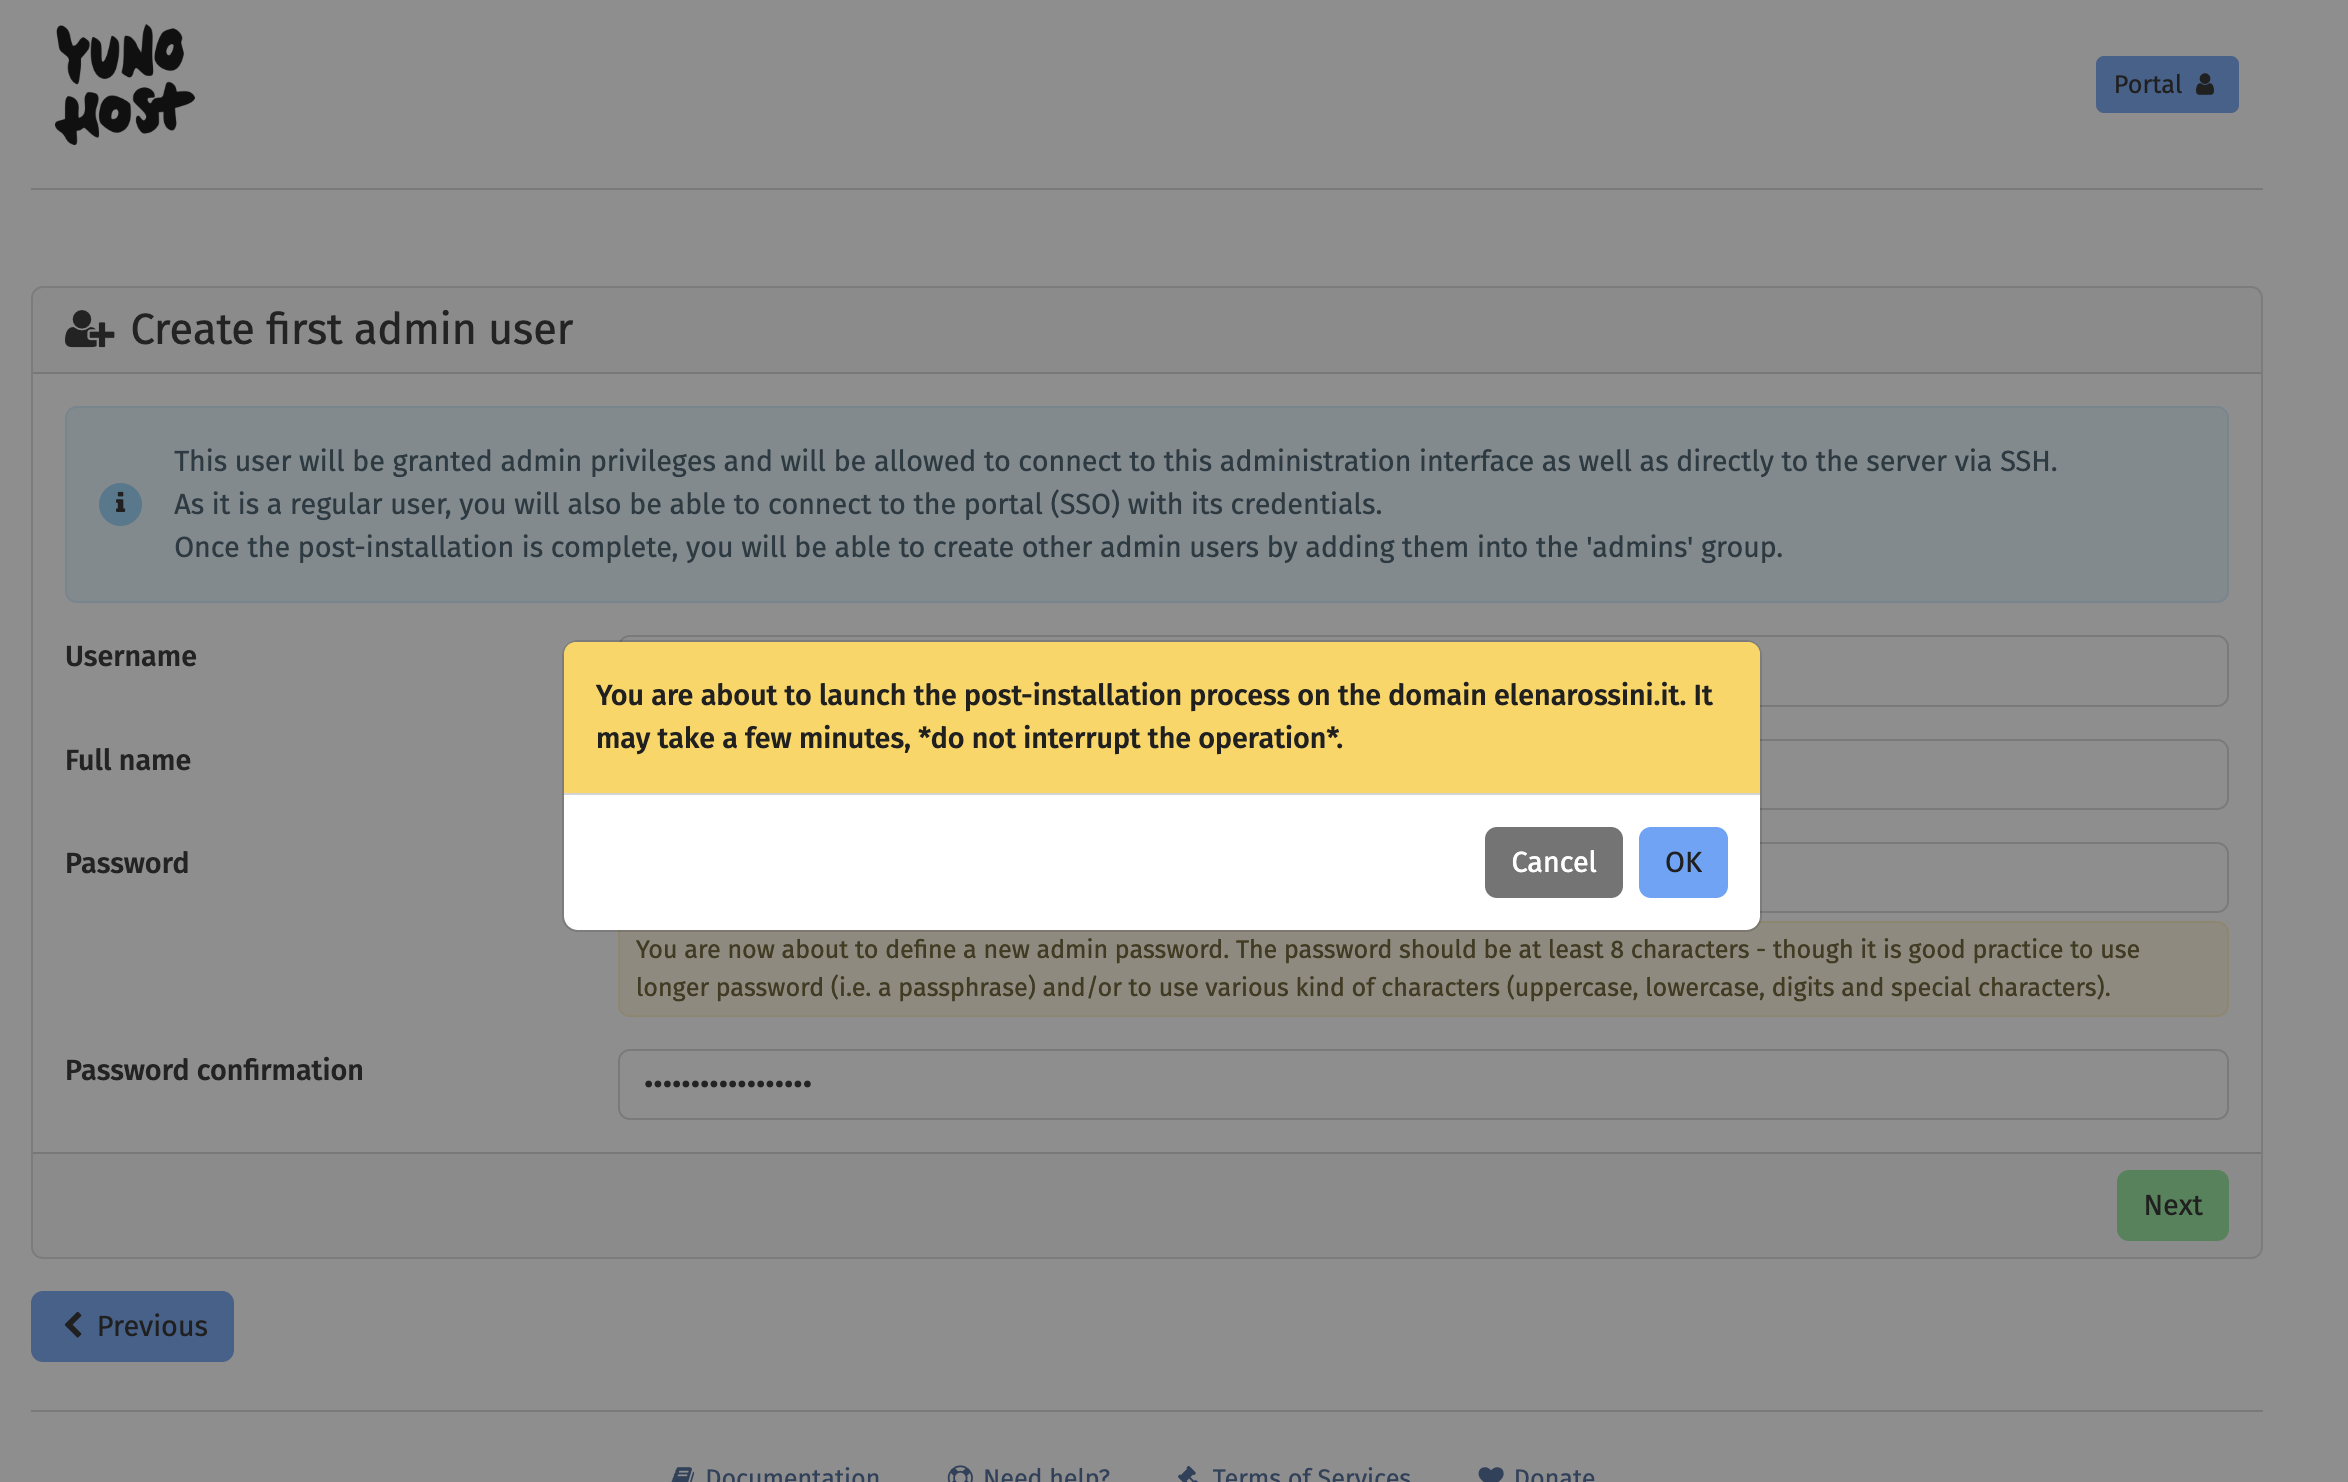
Click on "OK" to launch the post-installation process.
You should see a screen like this:
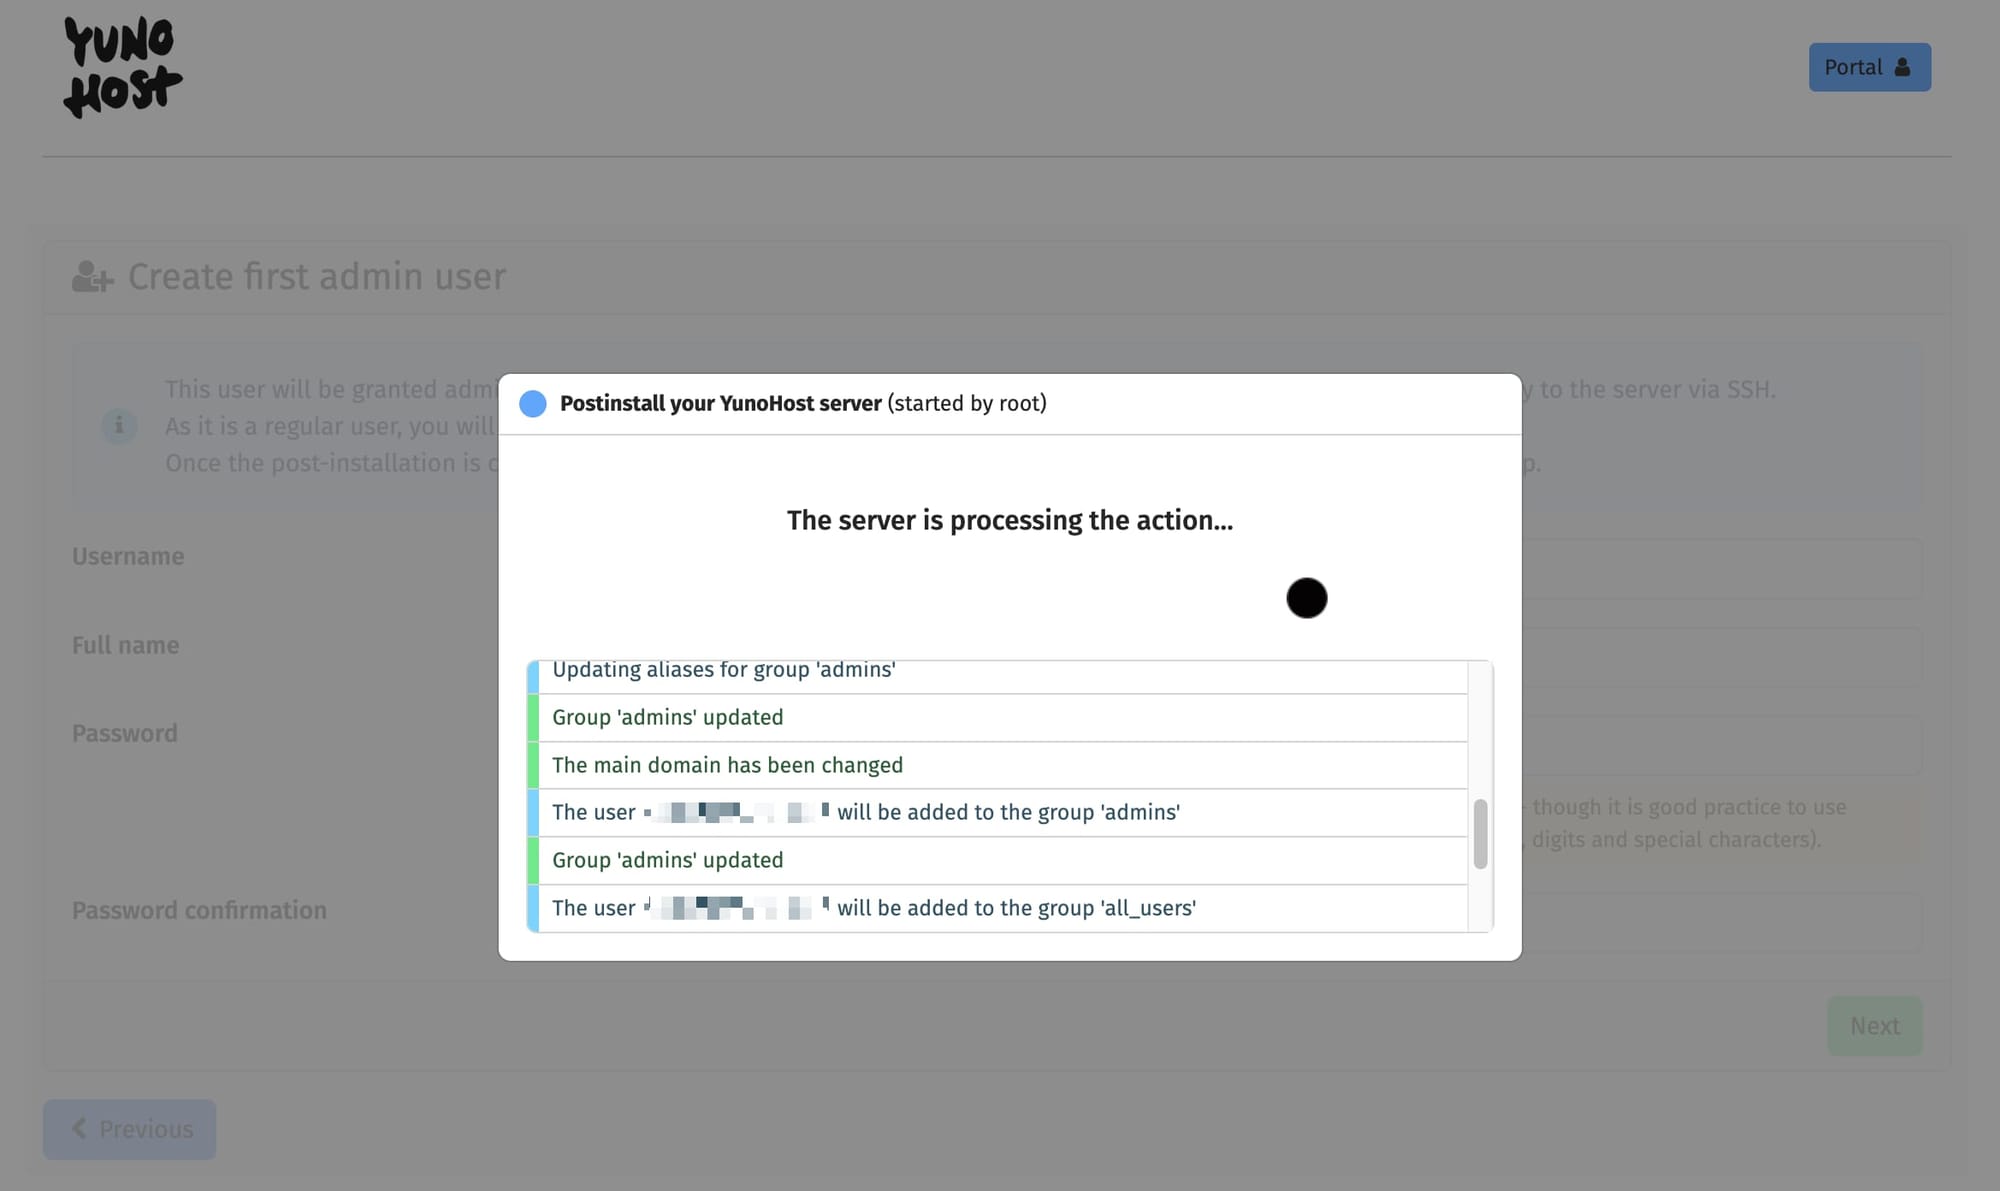
Just let it run.
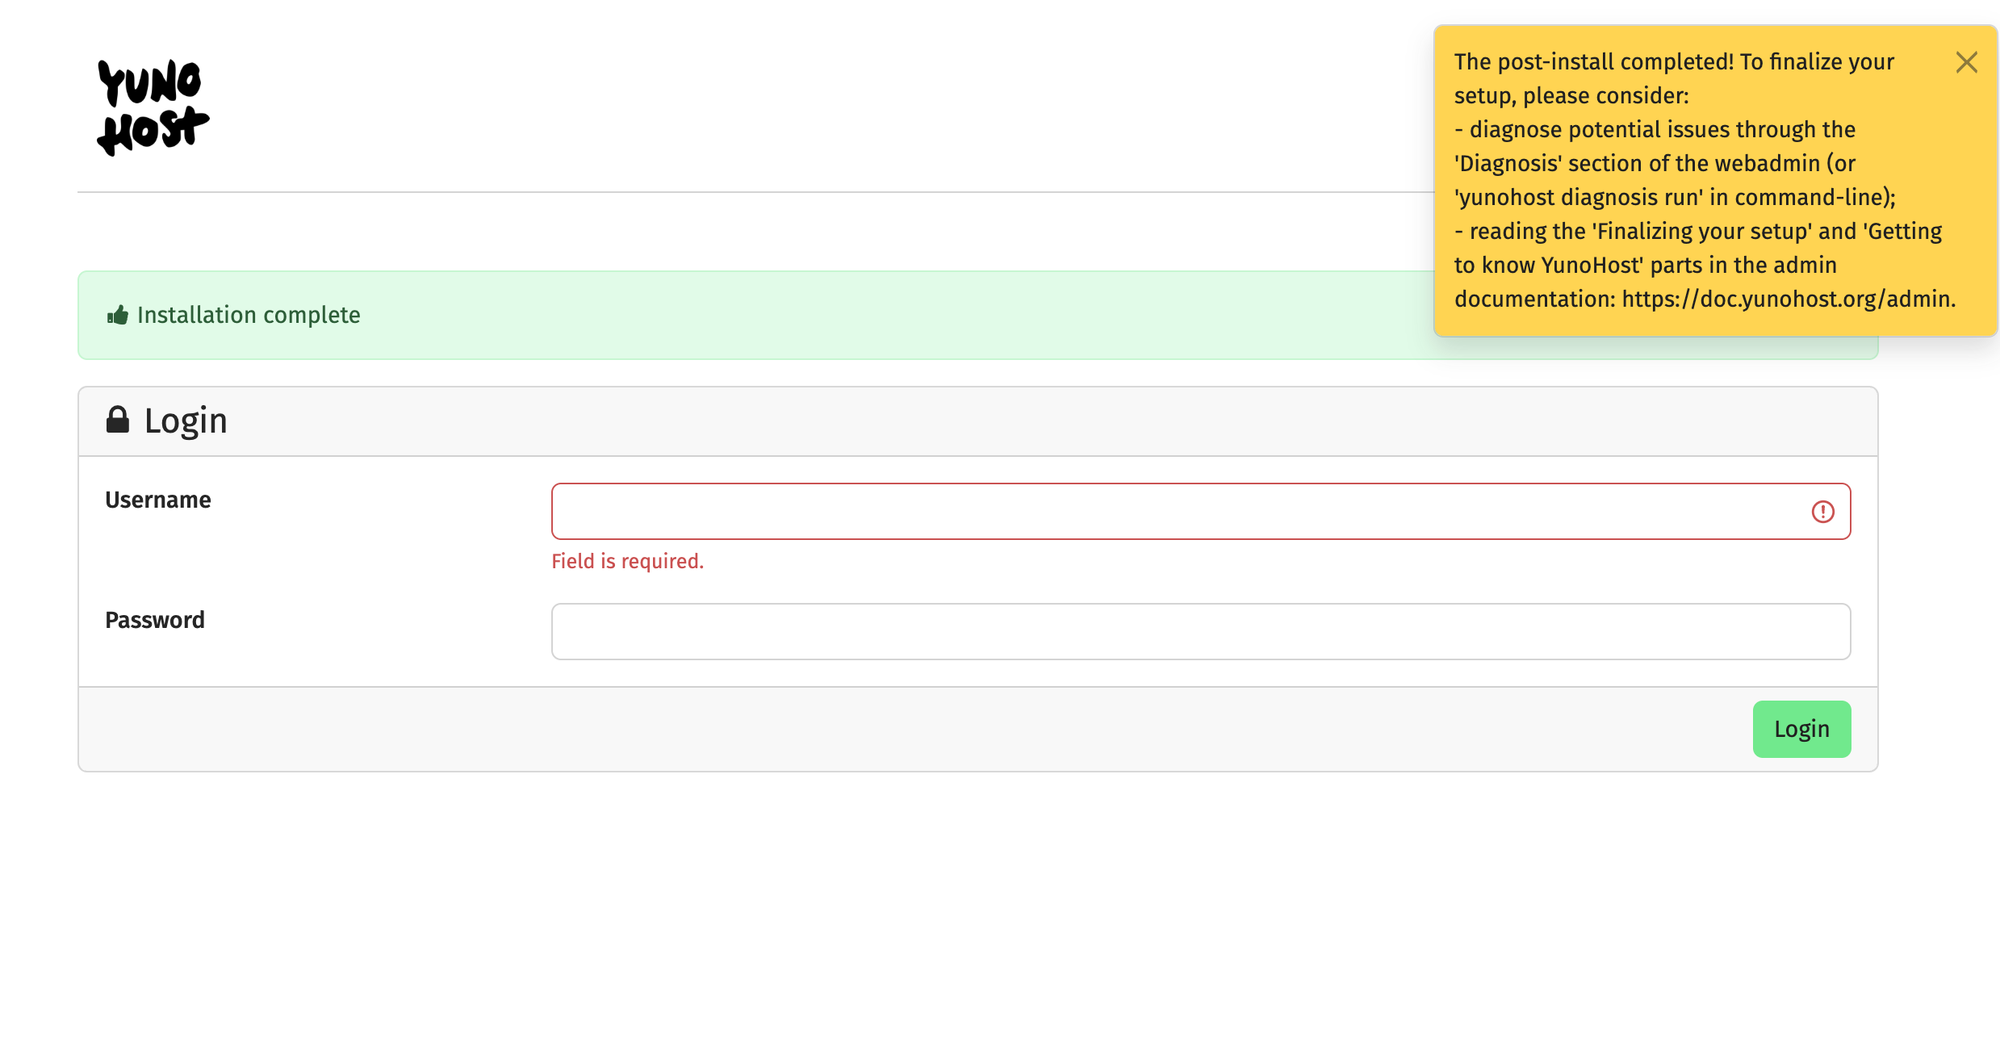
When the process is complete, you should see this login screen, with a confirmation "Installation complete" and a yellow window that recommends you finalize your setup.
Simply log in with the username and password you created earlier ("Create first admin user").
Now the post-installation is almost complete: when you log in and click on “Domains” you should see the domain name you added in the previous step.
Click on your domain.
You will then see a page like this:
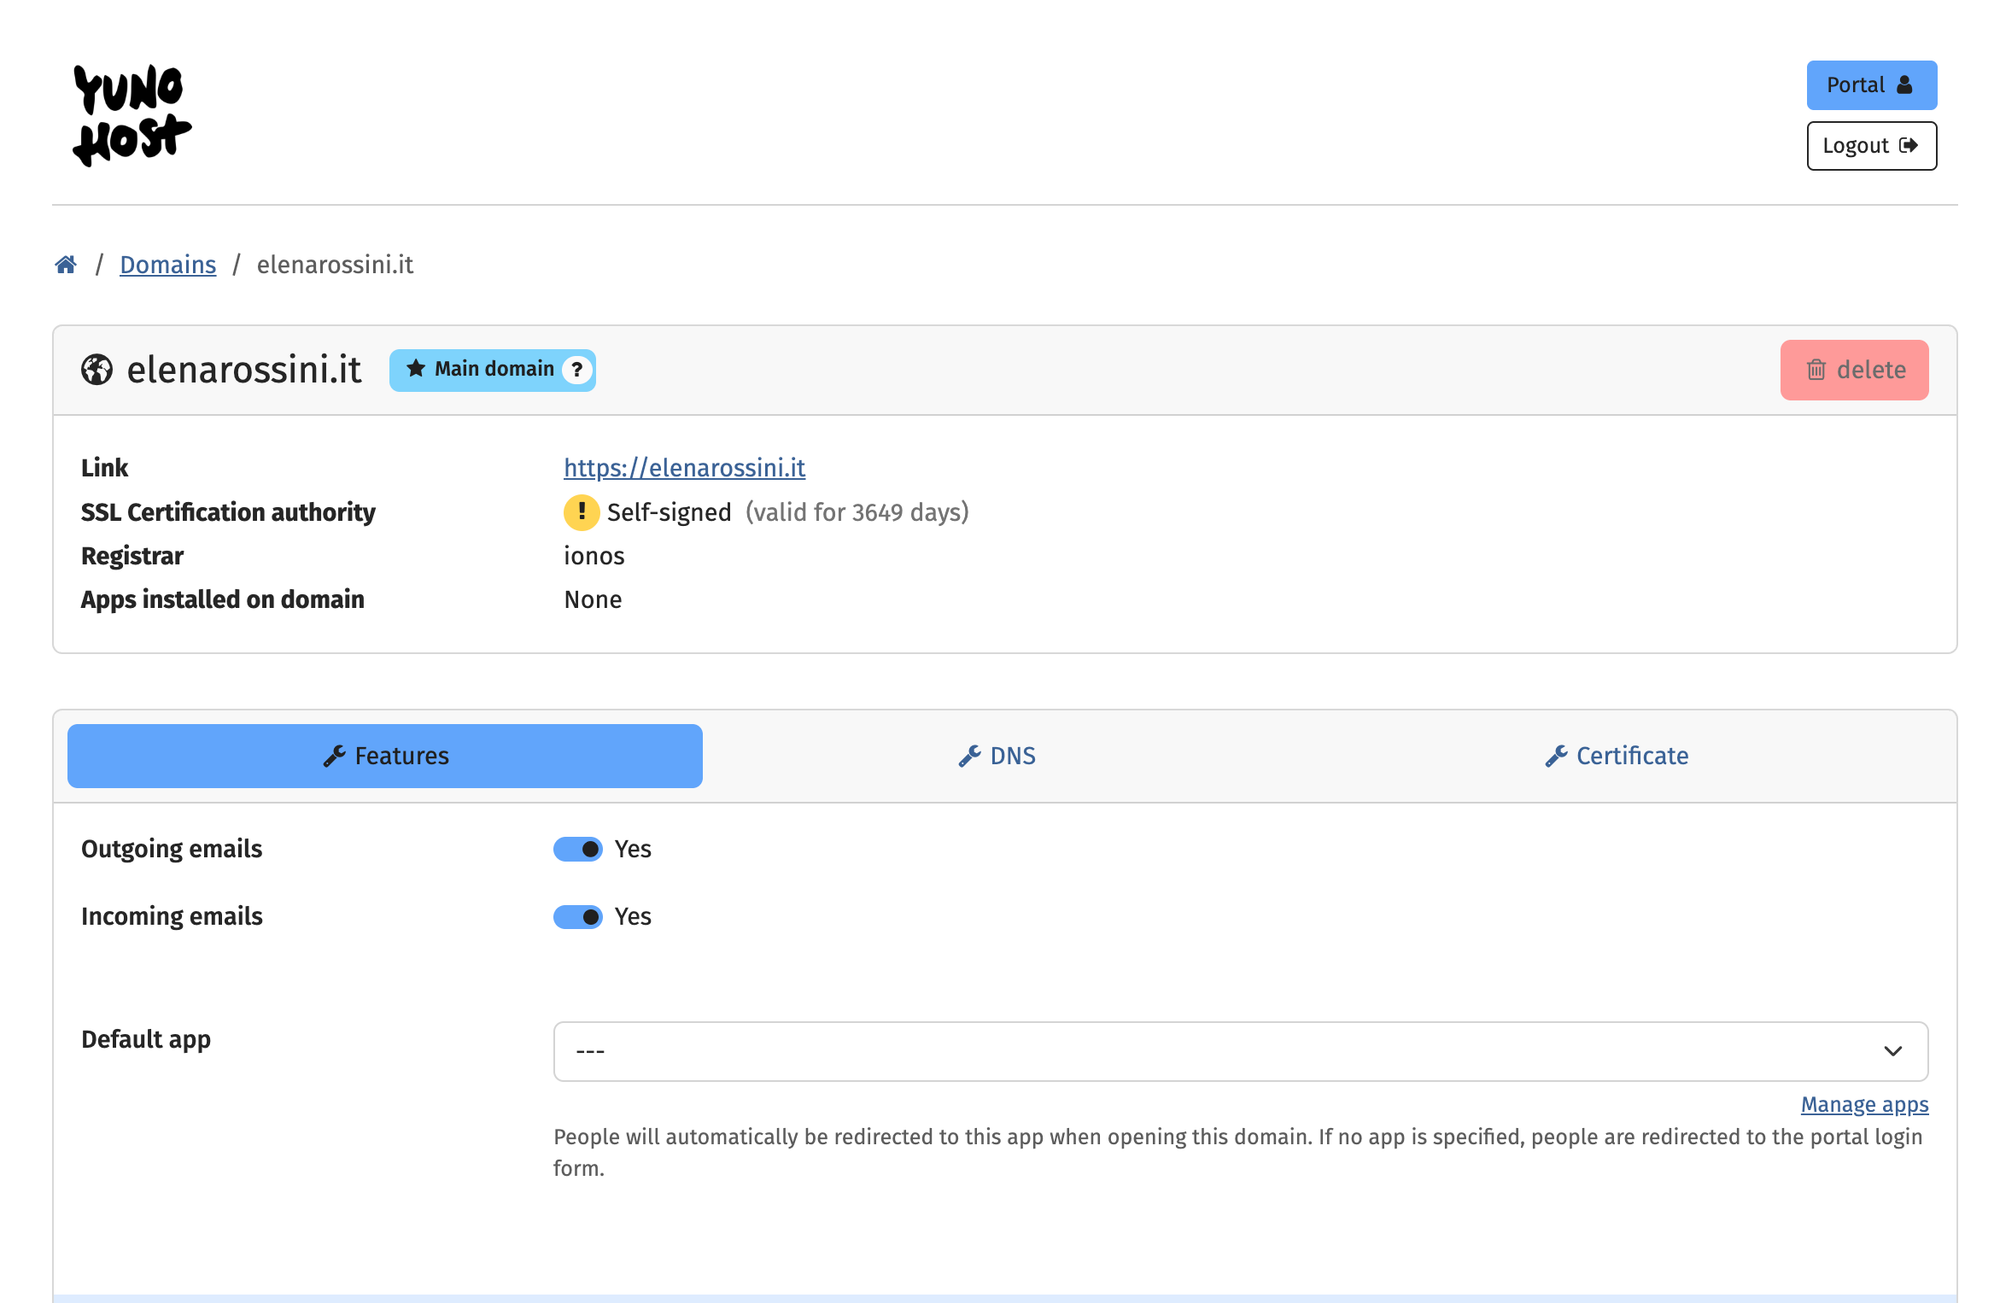
Click on the "DNS" tab (in the middle, next to "Features").
You should see “Suggested DNS records for manual configuration”.

Log onto your domain name registrar, select the URL you picked for your YunoHost server and click on "Manage DNS" or "Edit DNS records".
Simply copy and paste all the values from the YunoHost setup page to the page of your domain name registrar.
You will need to create or override these records:
- A record
- AAAA record
- MX record
- TXT record
- CAA record
and optional: another A record and another AAAA record for *
Simply copy and paste all the configurations from the YunoHost DNS page to your domain name registrar. Your domain may already have A and AAAA records, set by default by your registrar... override them with the values suggested by YunoHost.
STEP 5: Get a free SSL certificate
⏳ Estimated time: 1 minute
Once you’ve created all these records - especially the CAA one - you could navigate to the “Certificate” button on the page (the one next to “DNS”).
I usually click on “ignore diagnostic checks” and click on the green button “Install Let’s Encrypt certificate” (only do this if you've added a CAA record to your DNS configuration).
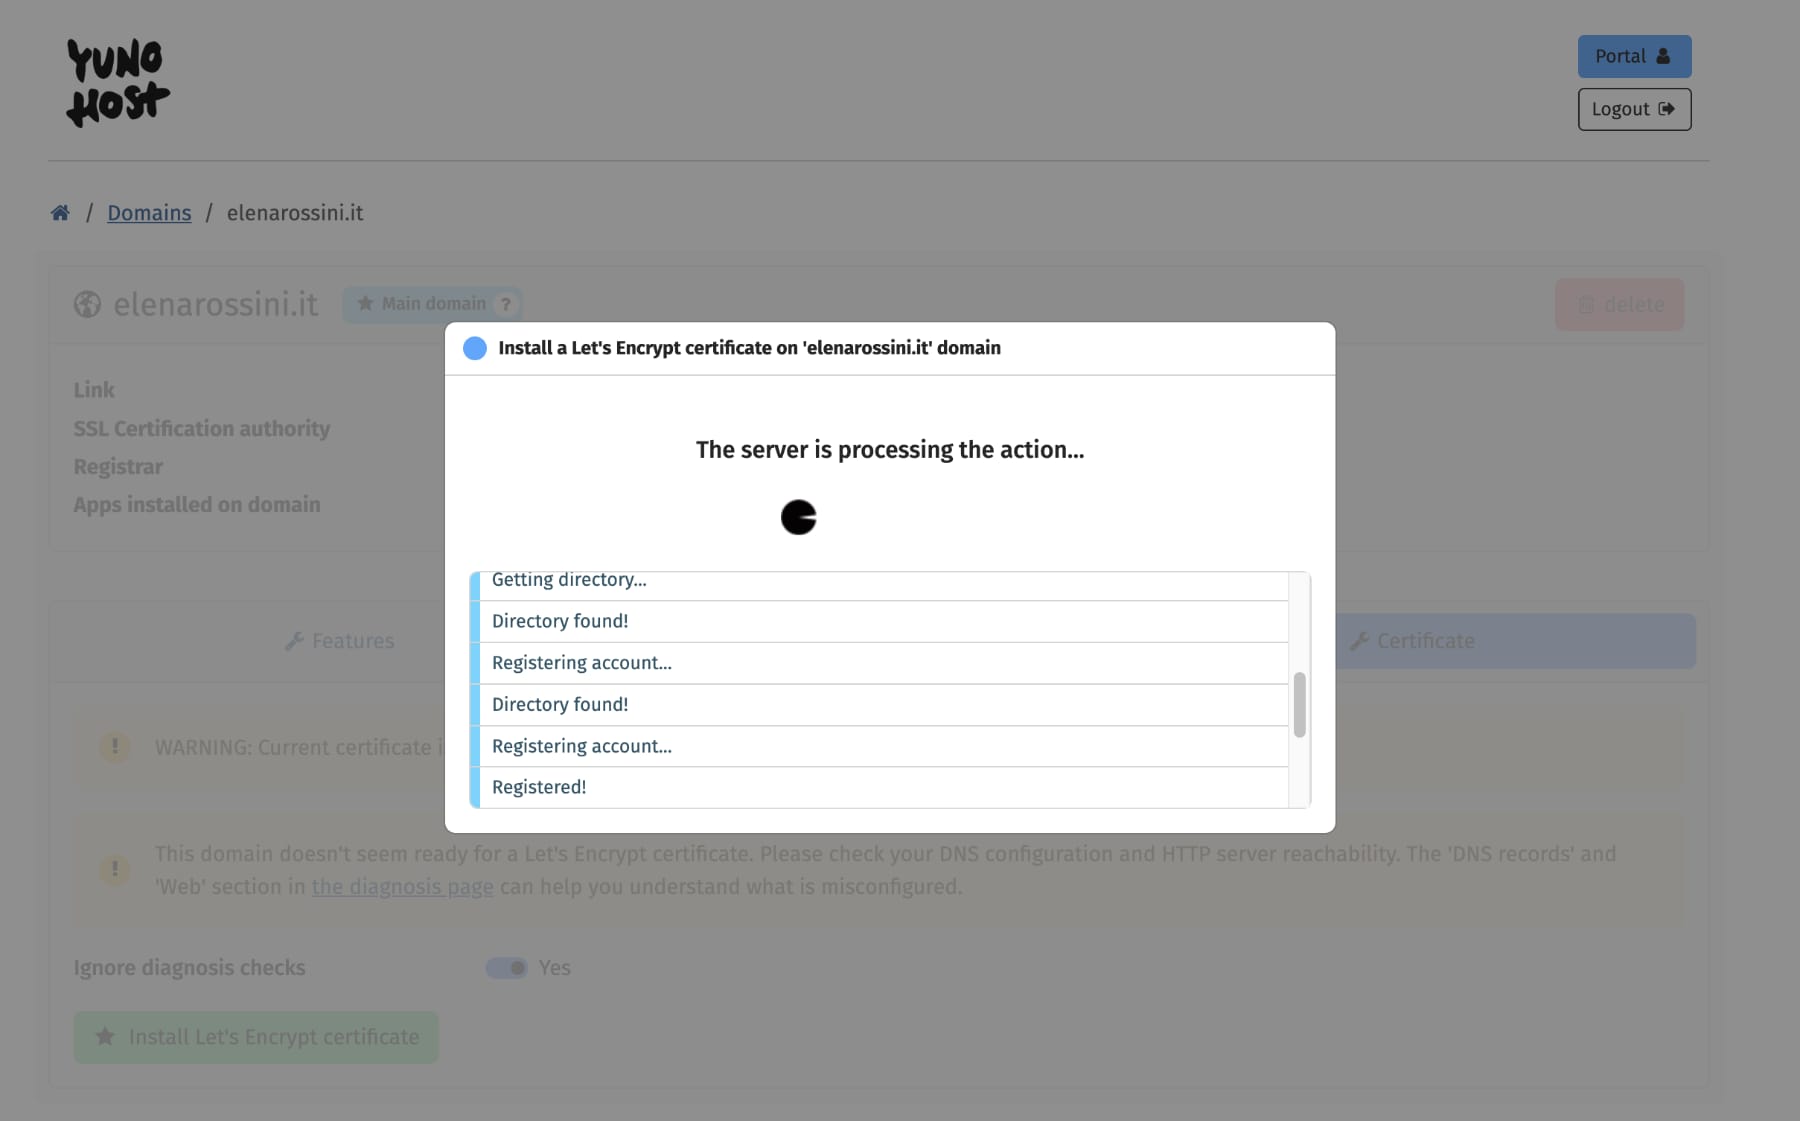
In less than a minute, you should get a confirmation that looks like this:
STEP 6: Create a login page for your YunoHost instance
⏳ Estimated time: 8 minutes
You’ve successfully connected your domain name to your server running YunoHost. Now what? Well, I recommend keeping the top level domain (in my case: elenarossini.it) available for an app to use and using a different URL to log in your YunoHost dashboard.
The login URL could be something like: login.yourdomain.com or admin.yourdomain.com or hey.yourdomain.com … anything original that will not interfere with apps you’ll be using in the future.
I find it important to say this because this October I bricked my test Sharkey instance by using the same domain as the YunoHost admin. You live and you learn... (I basically had to wipe my VPS and start over).
So let’s get started with the creation of a subdomain to manage your YunoHost server.
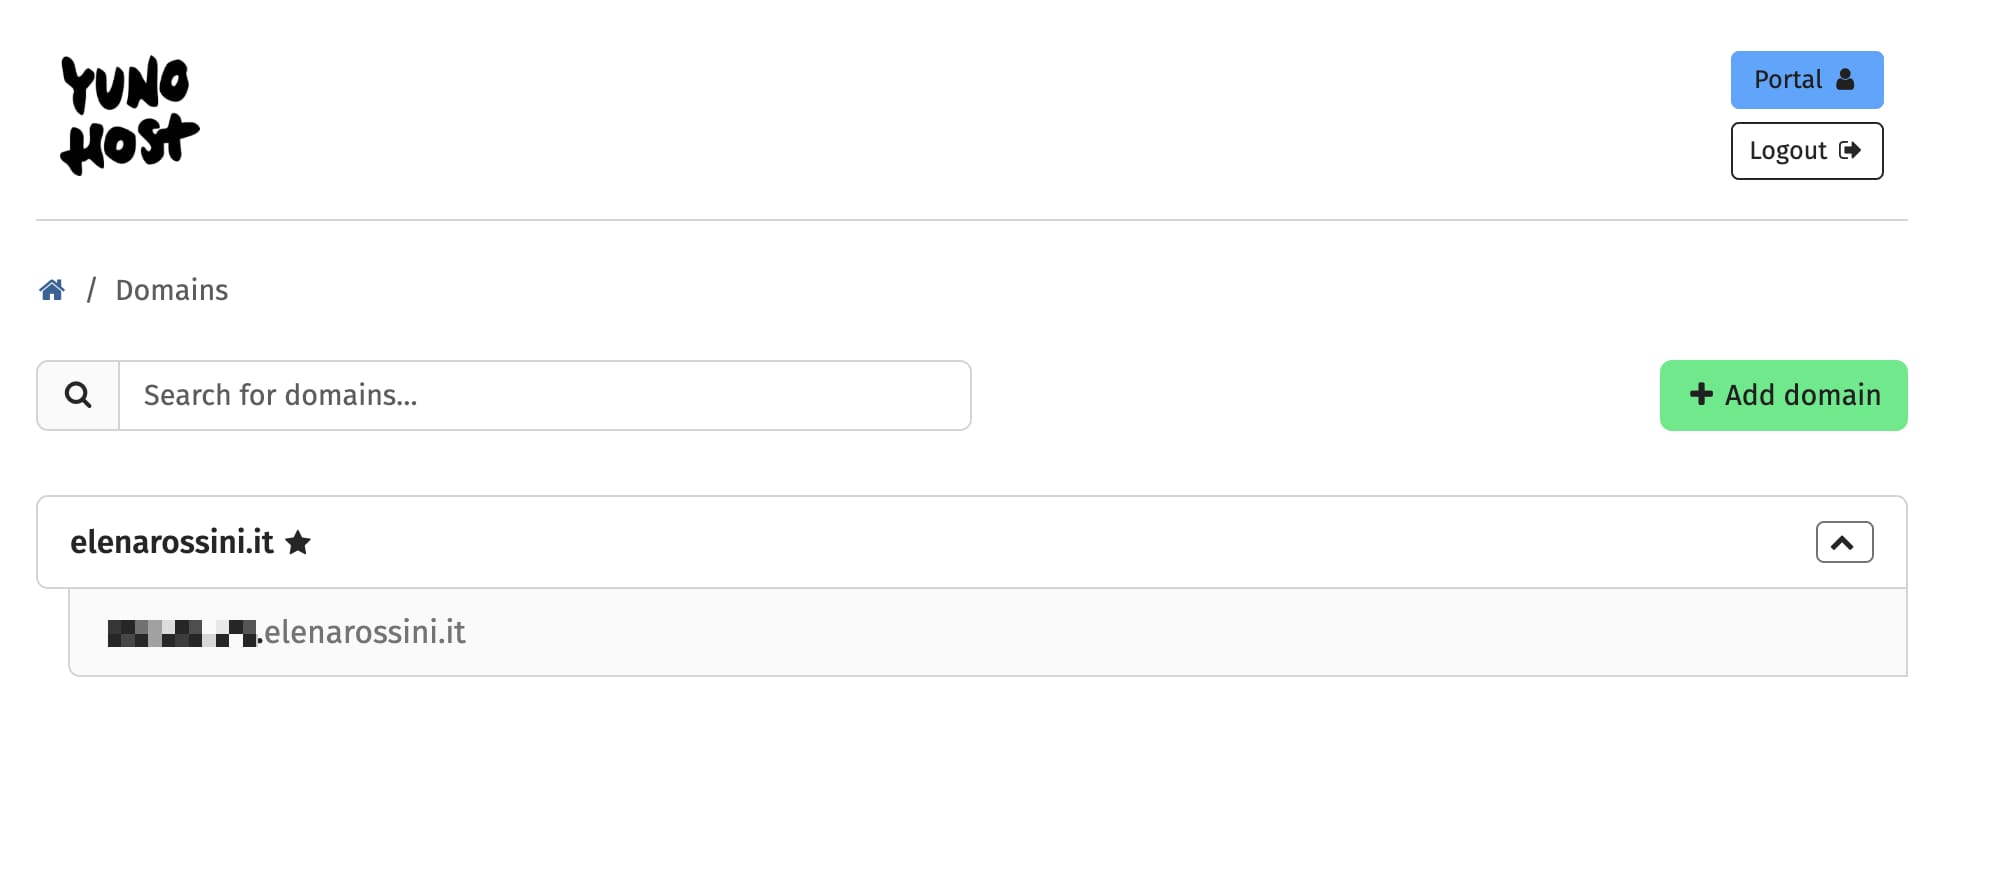
Simply go to: Domains → Add Domain
Then select: “I want to add a subdomain of an already added domain” and type the subdomain name you wish to use to manage your YunoHost server.
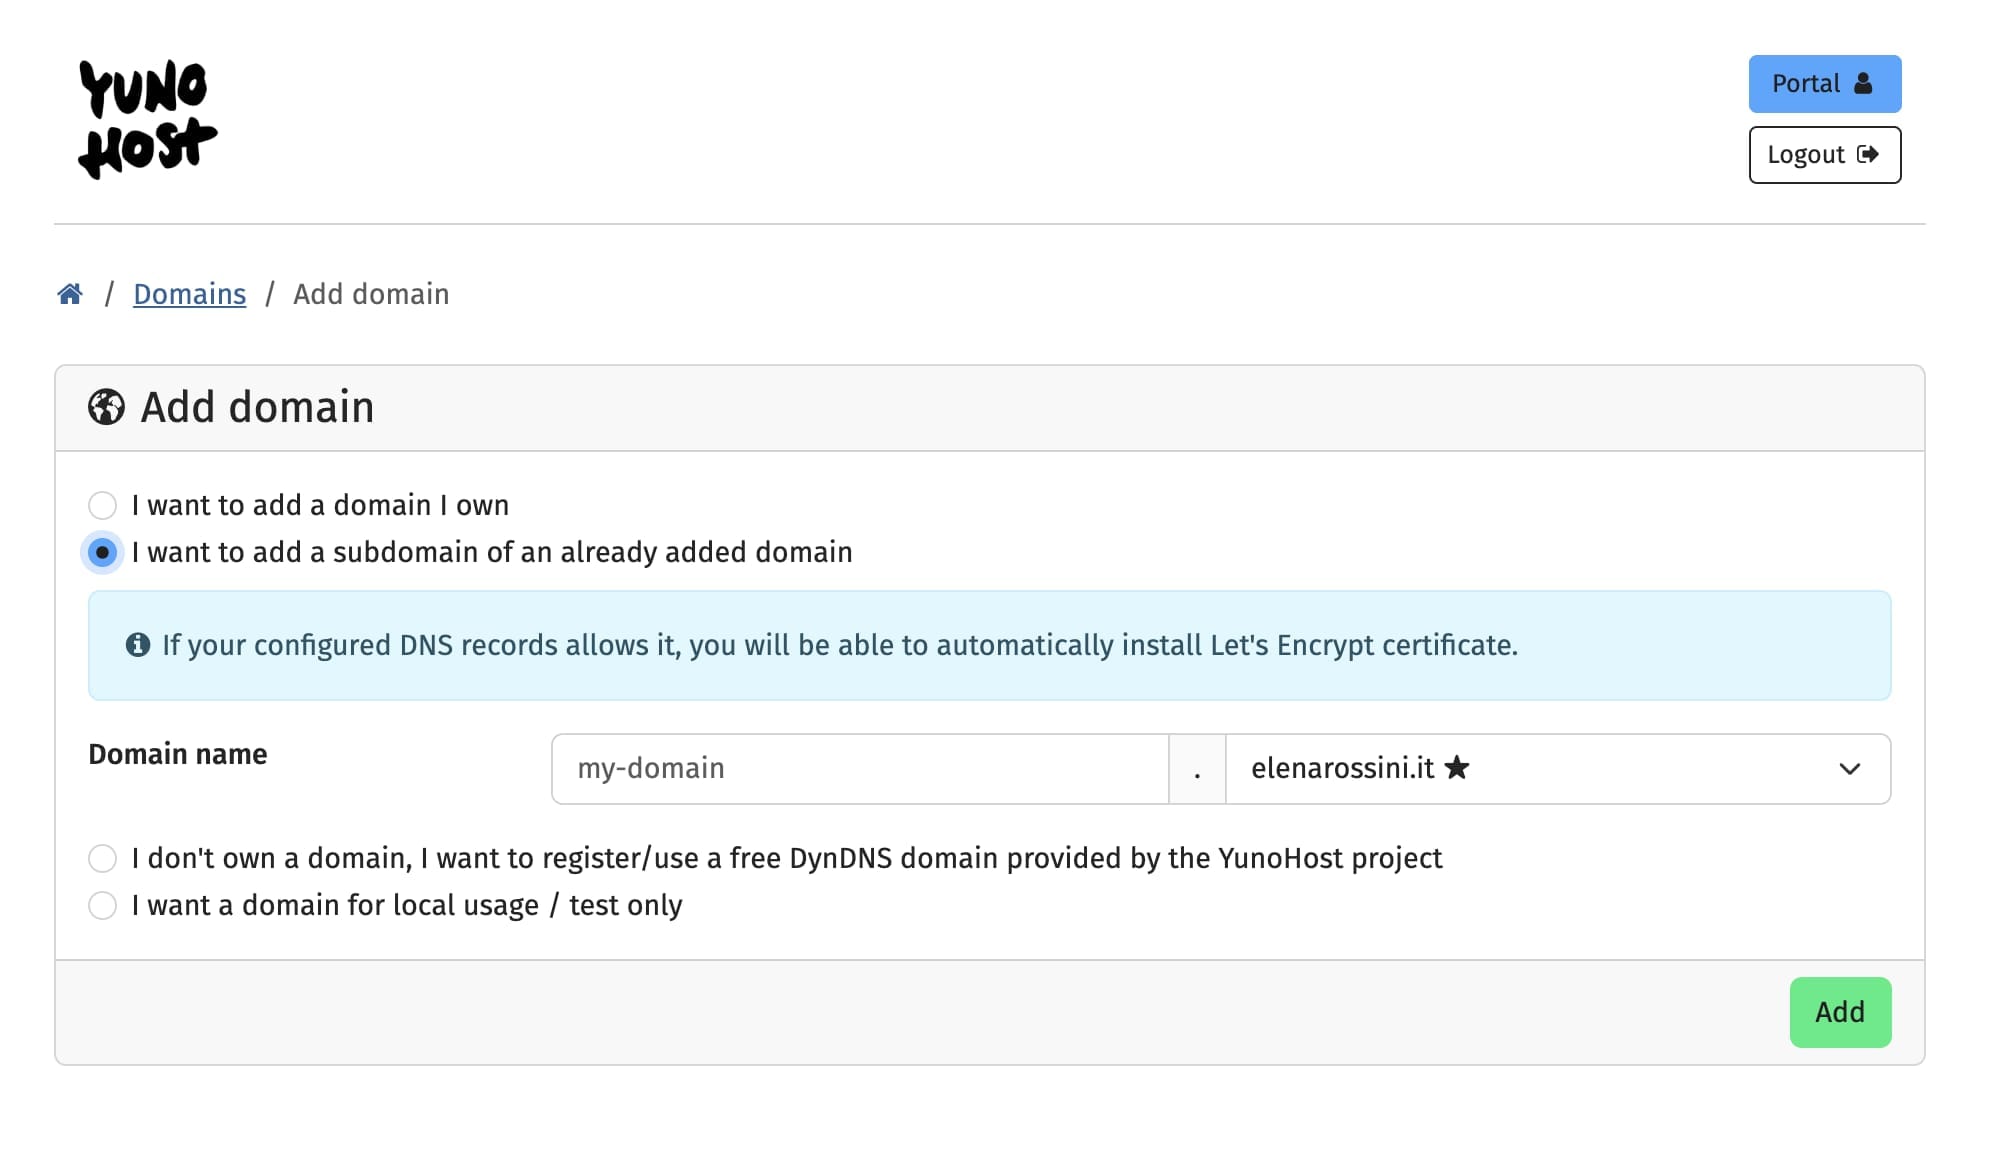
The subdomain will now appear nested under your main domain (I pixelated the subdomain to protect my server from brute force attacks... but it's basically mysubdomain.elenarossini.it)
Click on it and add DNS records for it to your domain registrar (A, AAAA, TXT, MX, CAA… like we did earlier). Repeat the steps to create a new Let’s Encrypt certificate for it (ignore checks, like before). (Reader: I'm not sure you need to install a brand new SSL certificate, but I do it just for peace of mind).
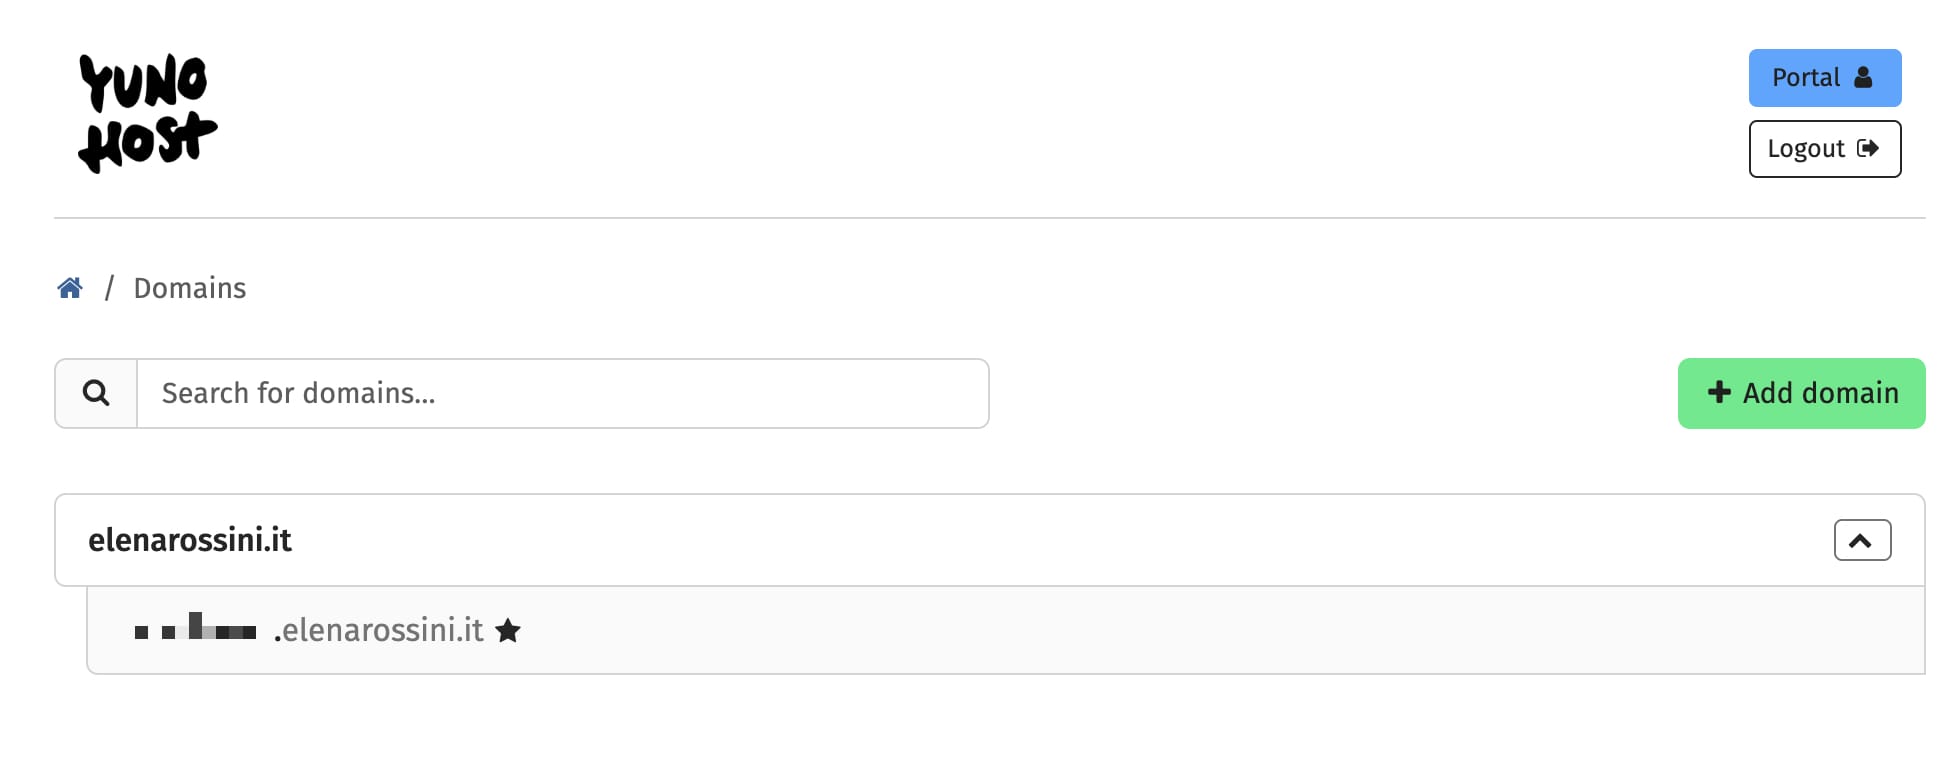
Then, under domains, click on the new subdomain... and click on the light blue button with a star that says “set default”.
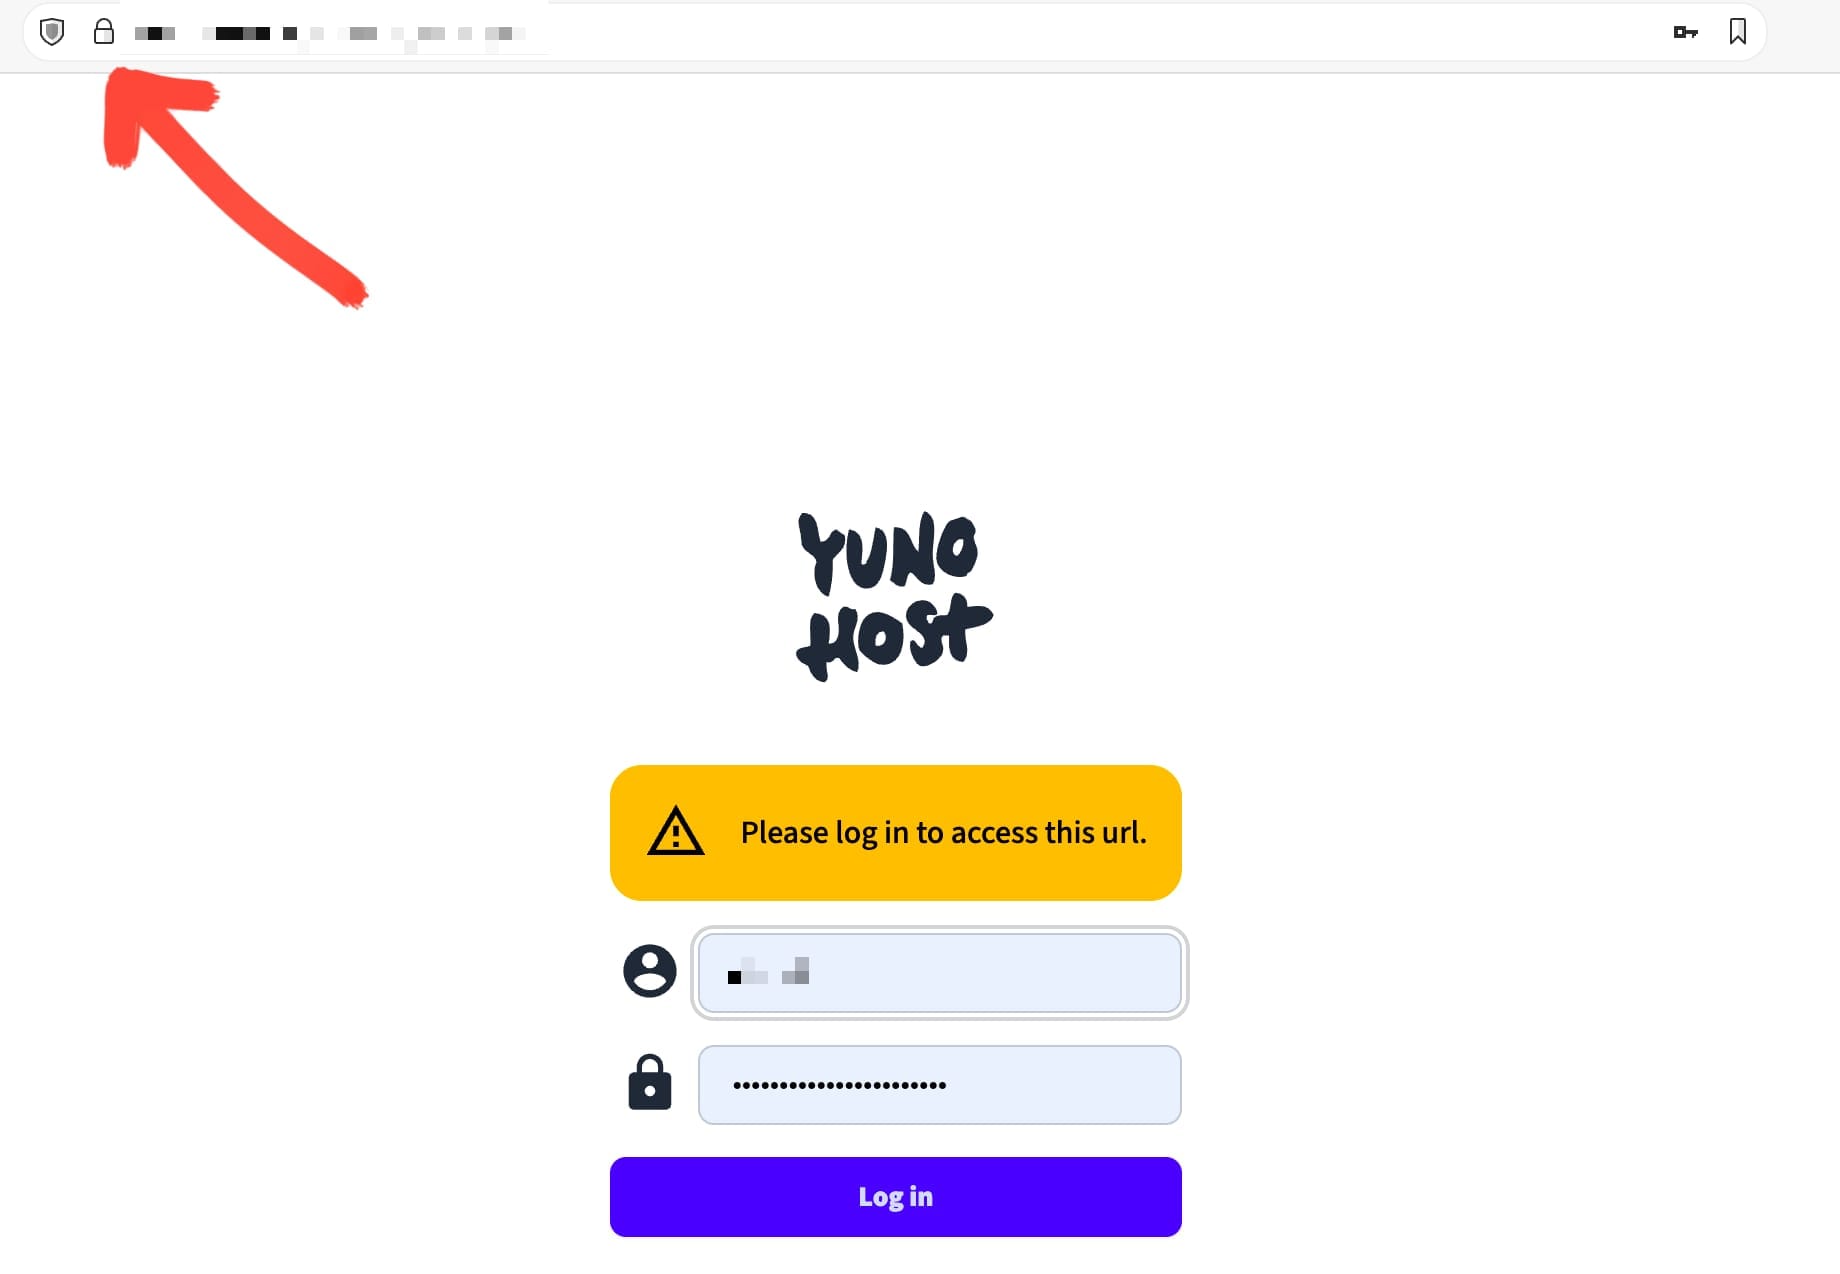
Now if you open up a new browser window in incognito mode and type the URL of your subdomain, the warning sign should be gone… replaced by the symbol of a lock… and the page should prompt you to log in to your YunoHost server:
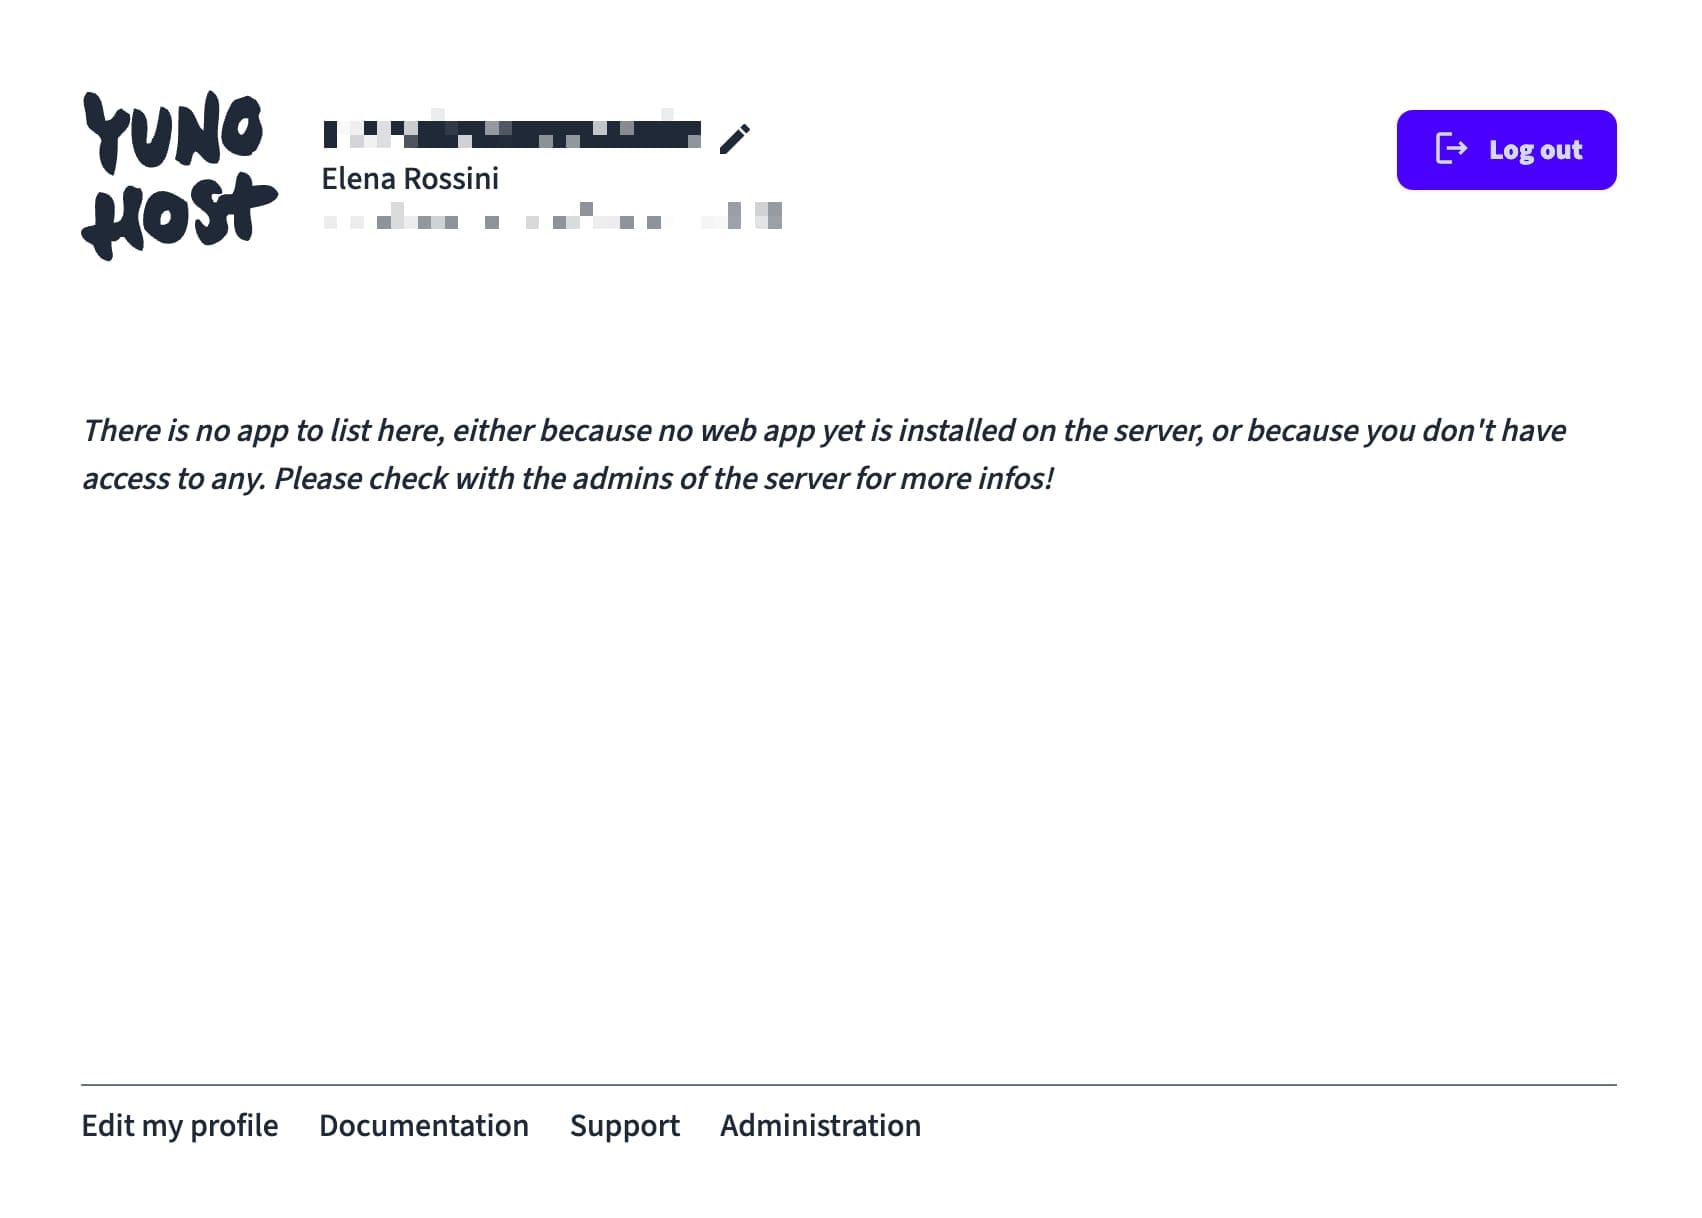
Voilà! Your YunoHost server is ready to install its first app!
For now it's simply showing this message, which is perfectly normal:
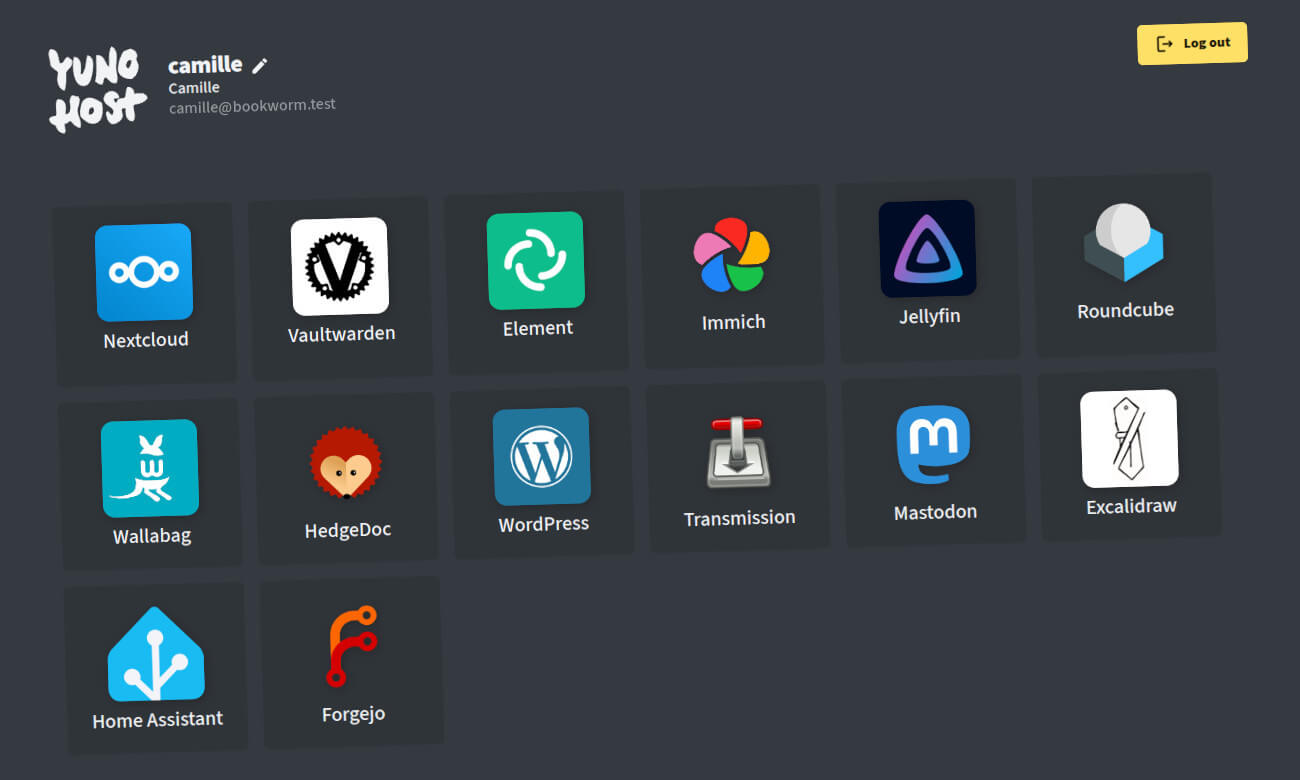
In the next installment of this series, I will show you how to install your first app: NextCloud (a powerful file hosting tool... with many incredible communications features).
For now, I would highly encourage you to log onto your "Administration" page, click on "Diagnosis" and run your first diagnostics check.
Thank you so much for reading this - I hope it's useful to you and giving you the courage to try self-hosting.
It's worth repeating that if you end up using YunoHost, I would highly encourage you to support the project by donating to them - either with a one off donation or a recurring one: https://donate.yunohost.org
Looking forward to the next installment. If you run into any issues with your installation, I recommend you check out YunoHost's official documentation:

YunoHost also has a fantastic support forum where you can ask questions / get help:

Thanks for being here,
Elena
💓 Did you enjoy this post? Share it with a friend!
👫 Follow me on Mastodon. All my other links are available here: elena.social
📽️ If you'd like to support my work, you could buy or rent my documentary The Illusionists on the globalization of beauty:

The Illusionists
THE ILLUSIONISTS is an award-winning documentary about the globalization of beauty and the dark side of advertising.
💌 If you'd like to say hi, my contact information is here
✏️ If this post resonated with you, leave a comment!